Documentation
Contact SupportCodemagic API settings
We need to connect to the Codemagic build virtual machine service and link the previously created Github repository to the Codemagic project to build the final application files (apk, aab and ipa). If you don't have an account yet, register a new one on the official website https://codemagic.io/. Go to the “Apps” section and add a new application by clicking the “Add your first app” button:
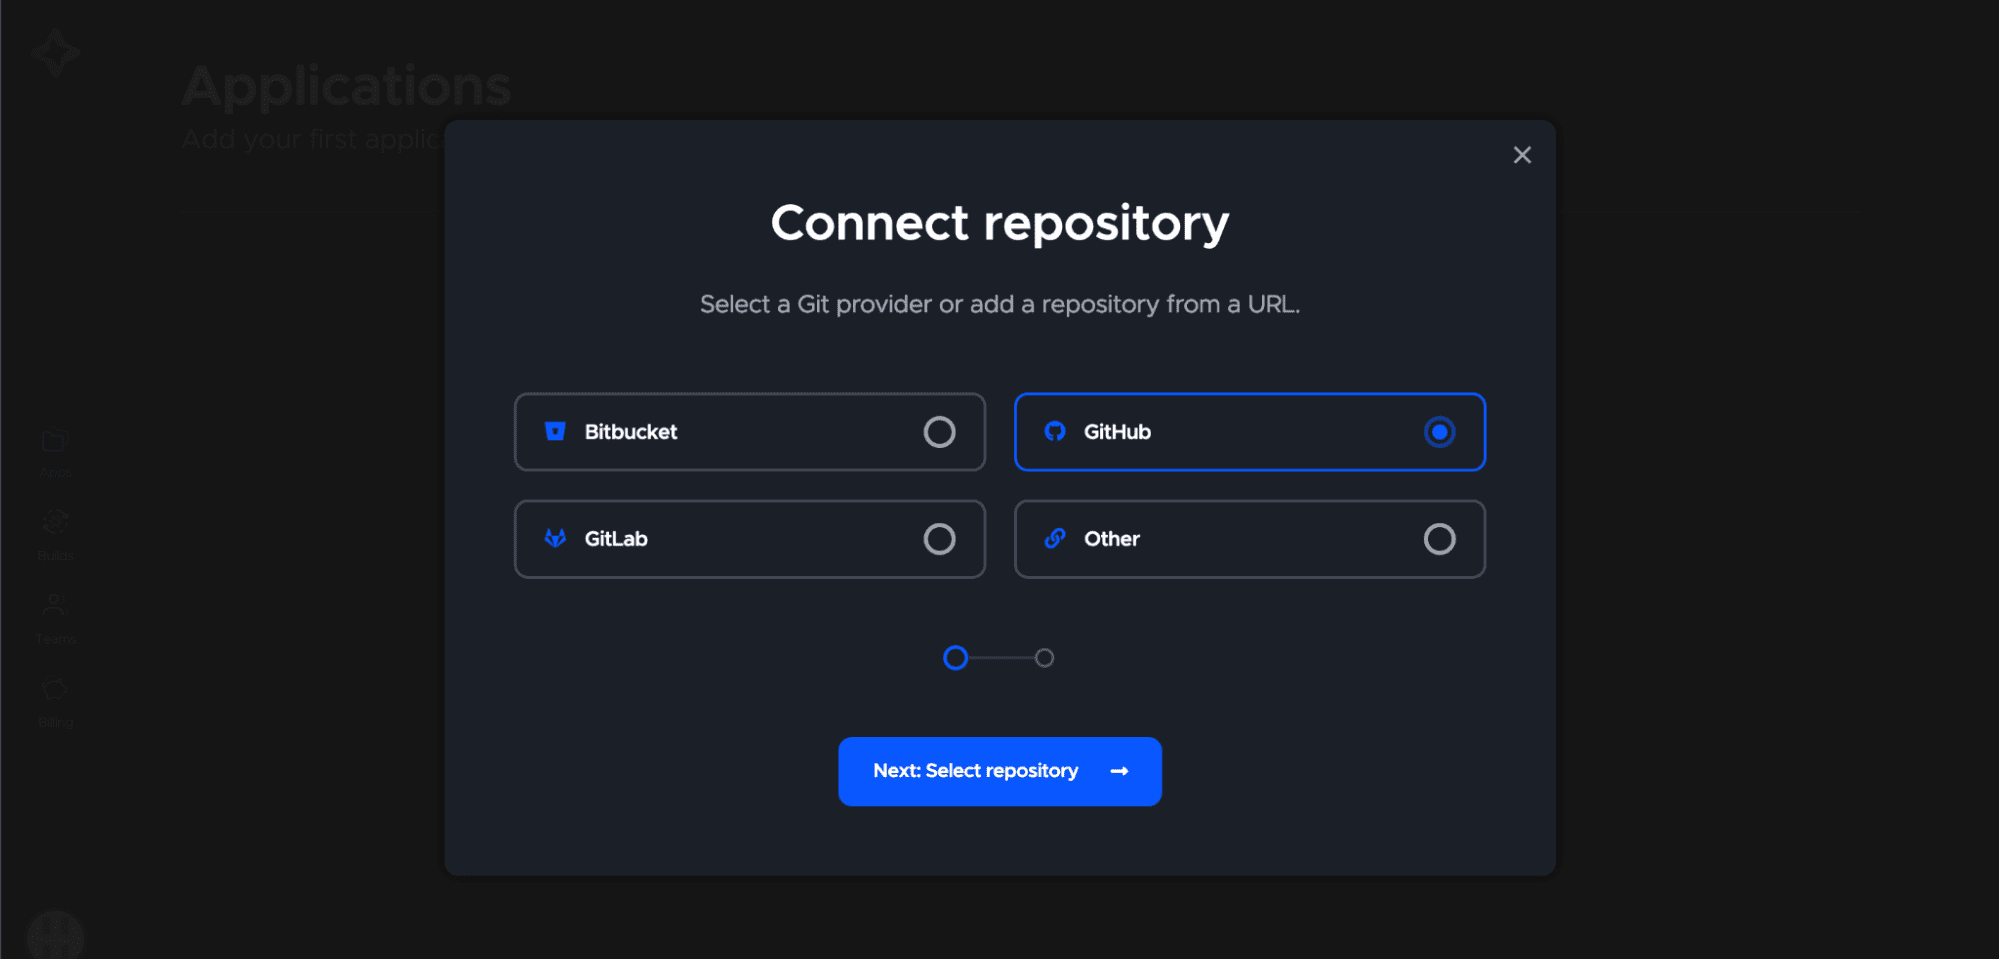
Select Github during the step of choosing a Git provider.
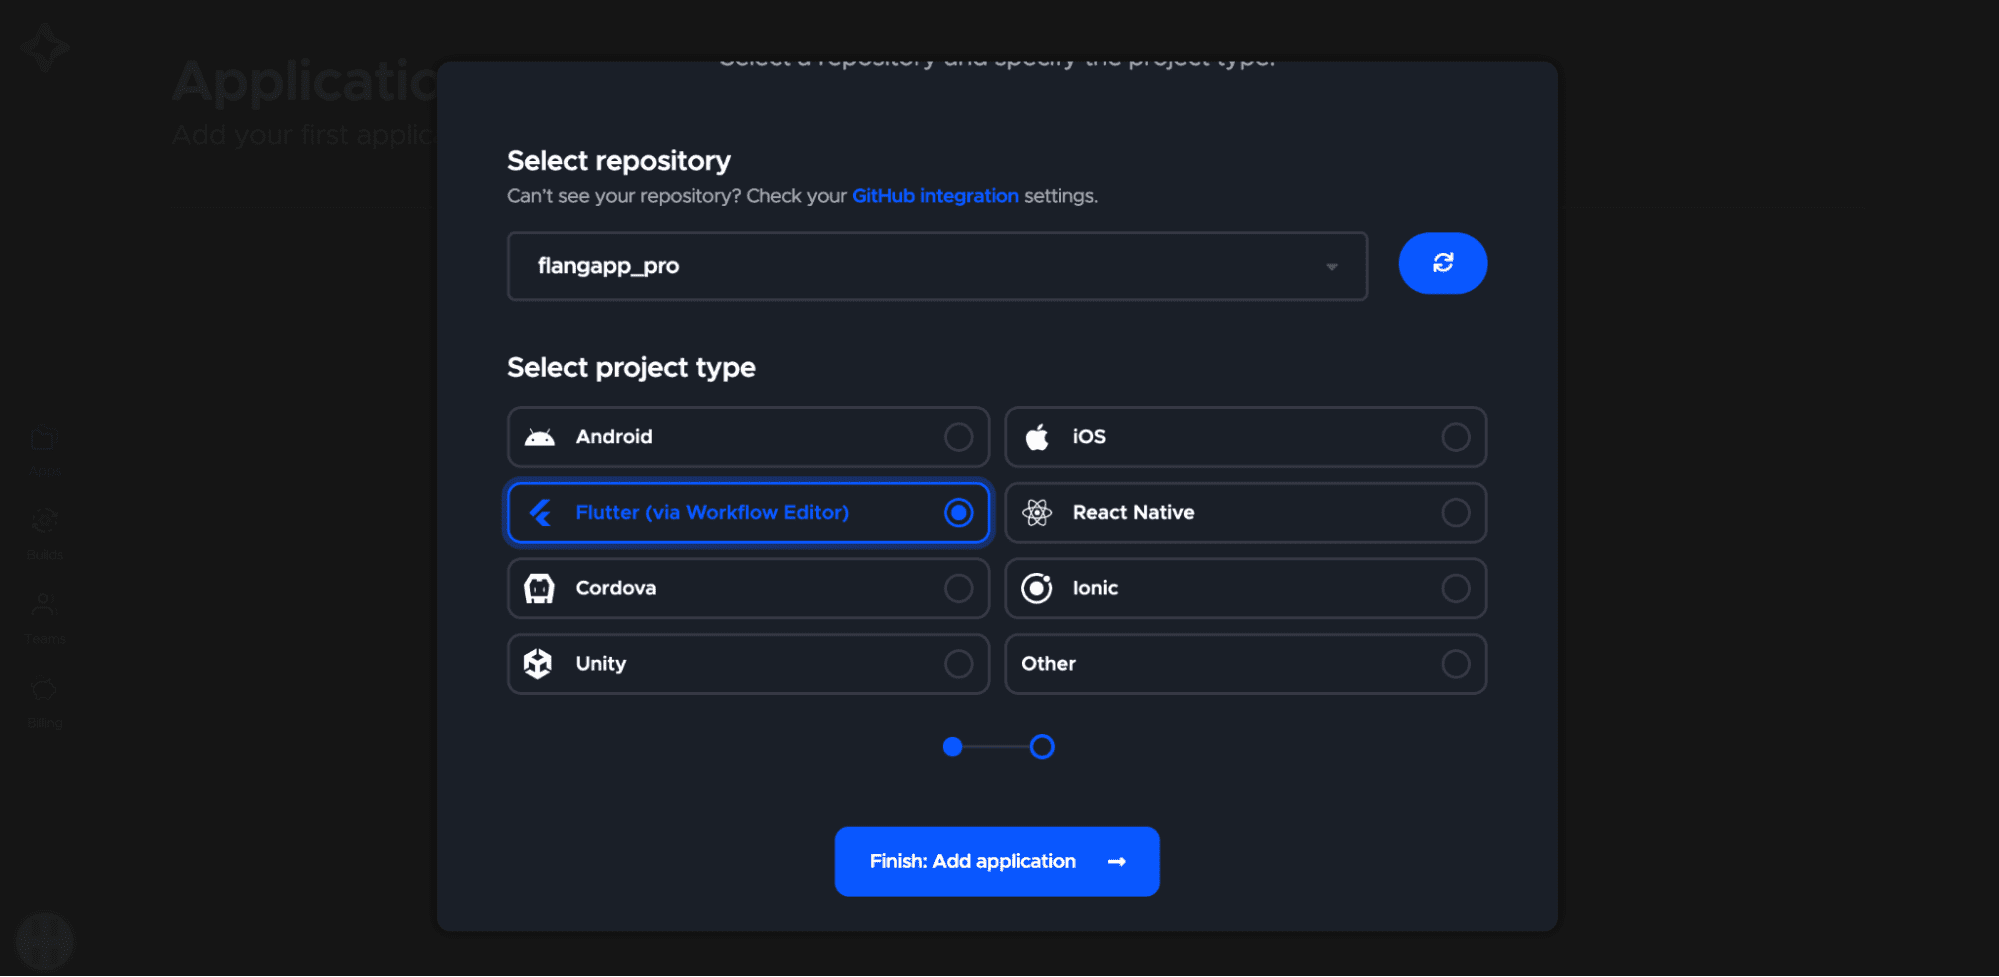
Select “flangapp_pro” repository and “Flutter (via Workflow editor)” project type. Click the “Finish: Add application” button.
Now you see the project settings page.
You don't need to change anything on this page because Flangapp PRO uses build process customization via codemagic.yaml files.
We just need to copy the APP ID - you can find it in the browser address bar:
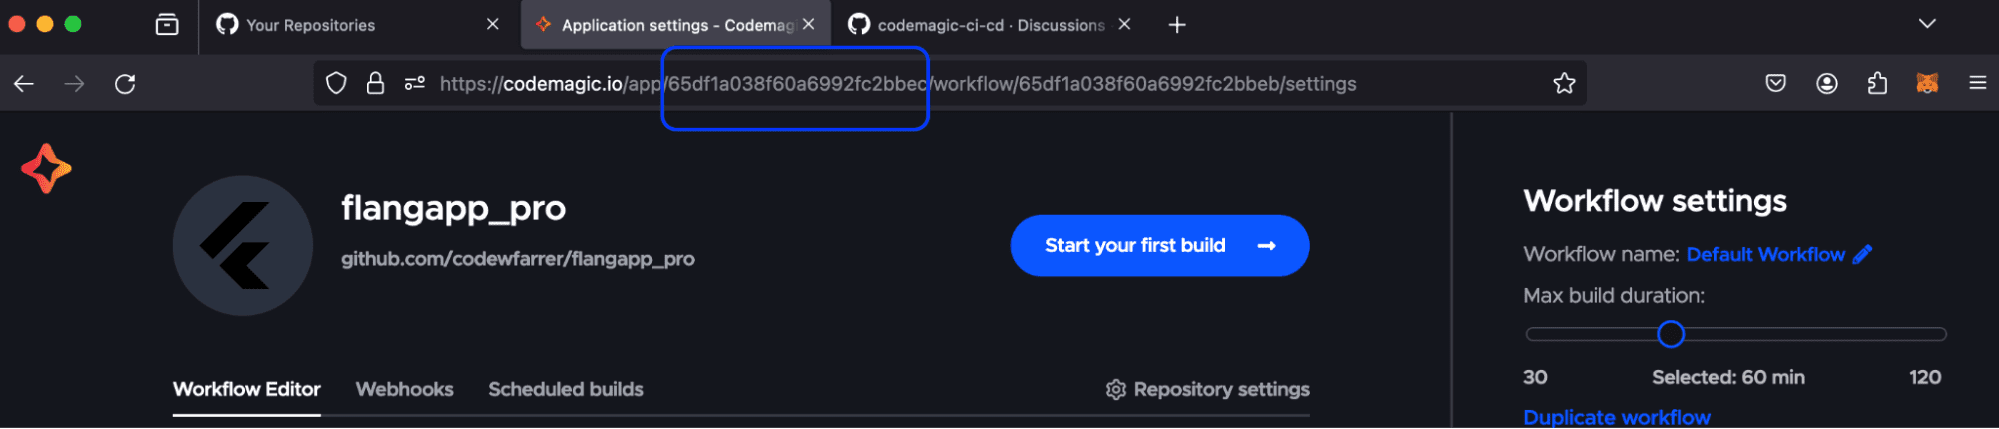
Save this value - we need to save these values in your project settings. Also we need to get an API key. Go to “Team” settings:
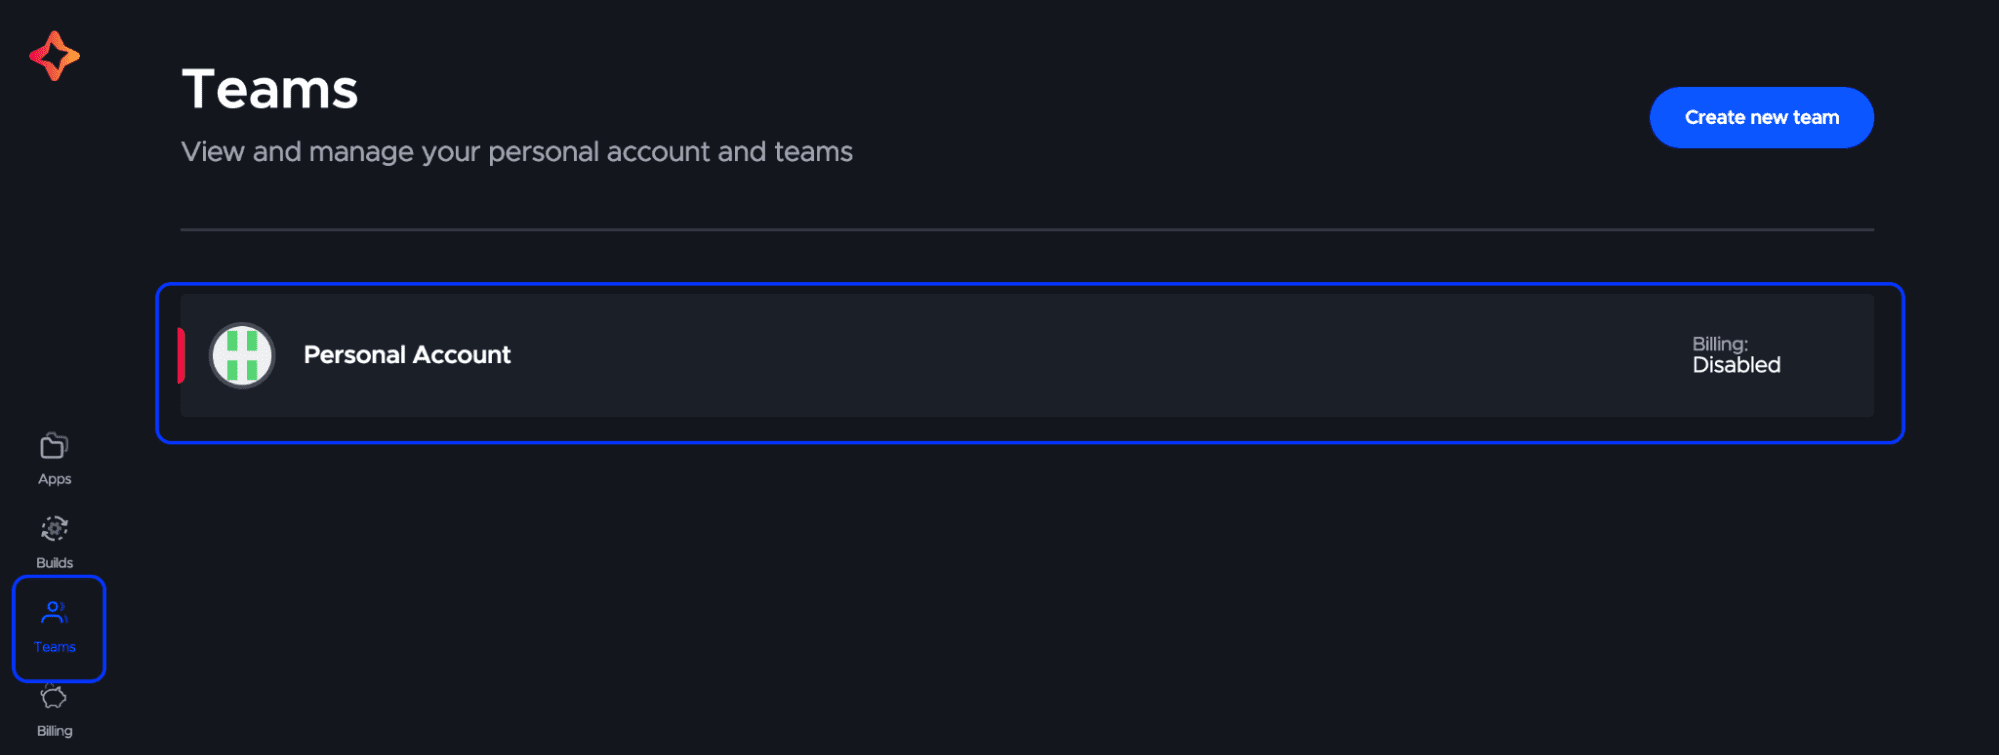
Click the “Personal account” section, select the “Integrations” tab:
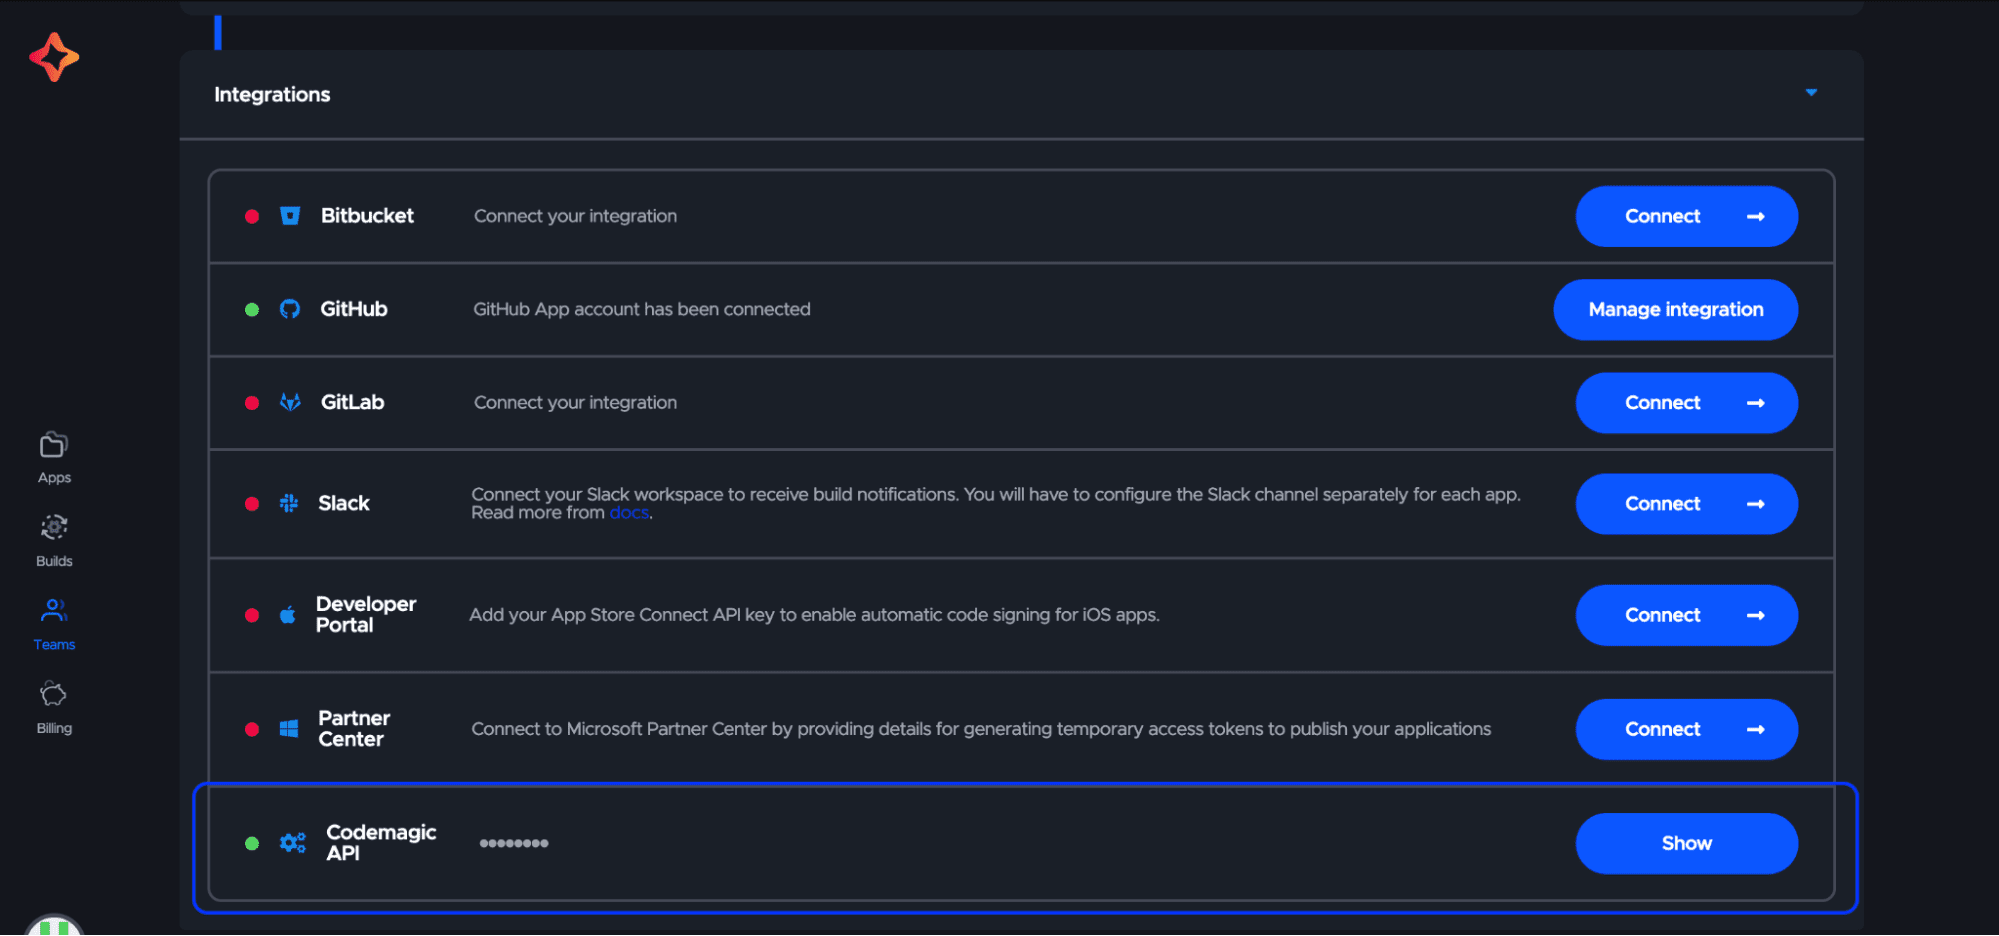
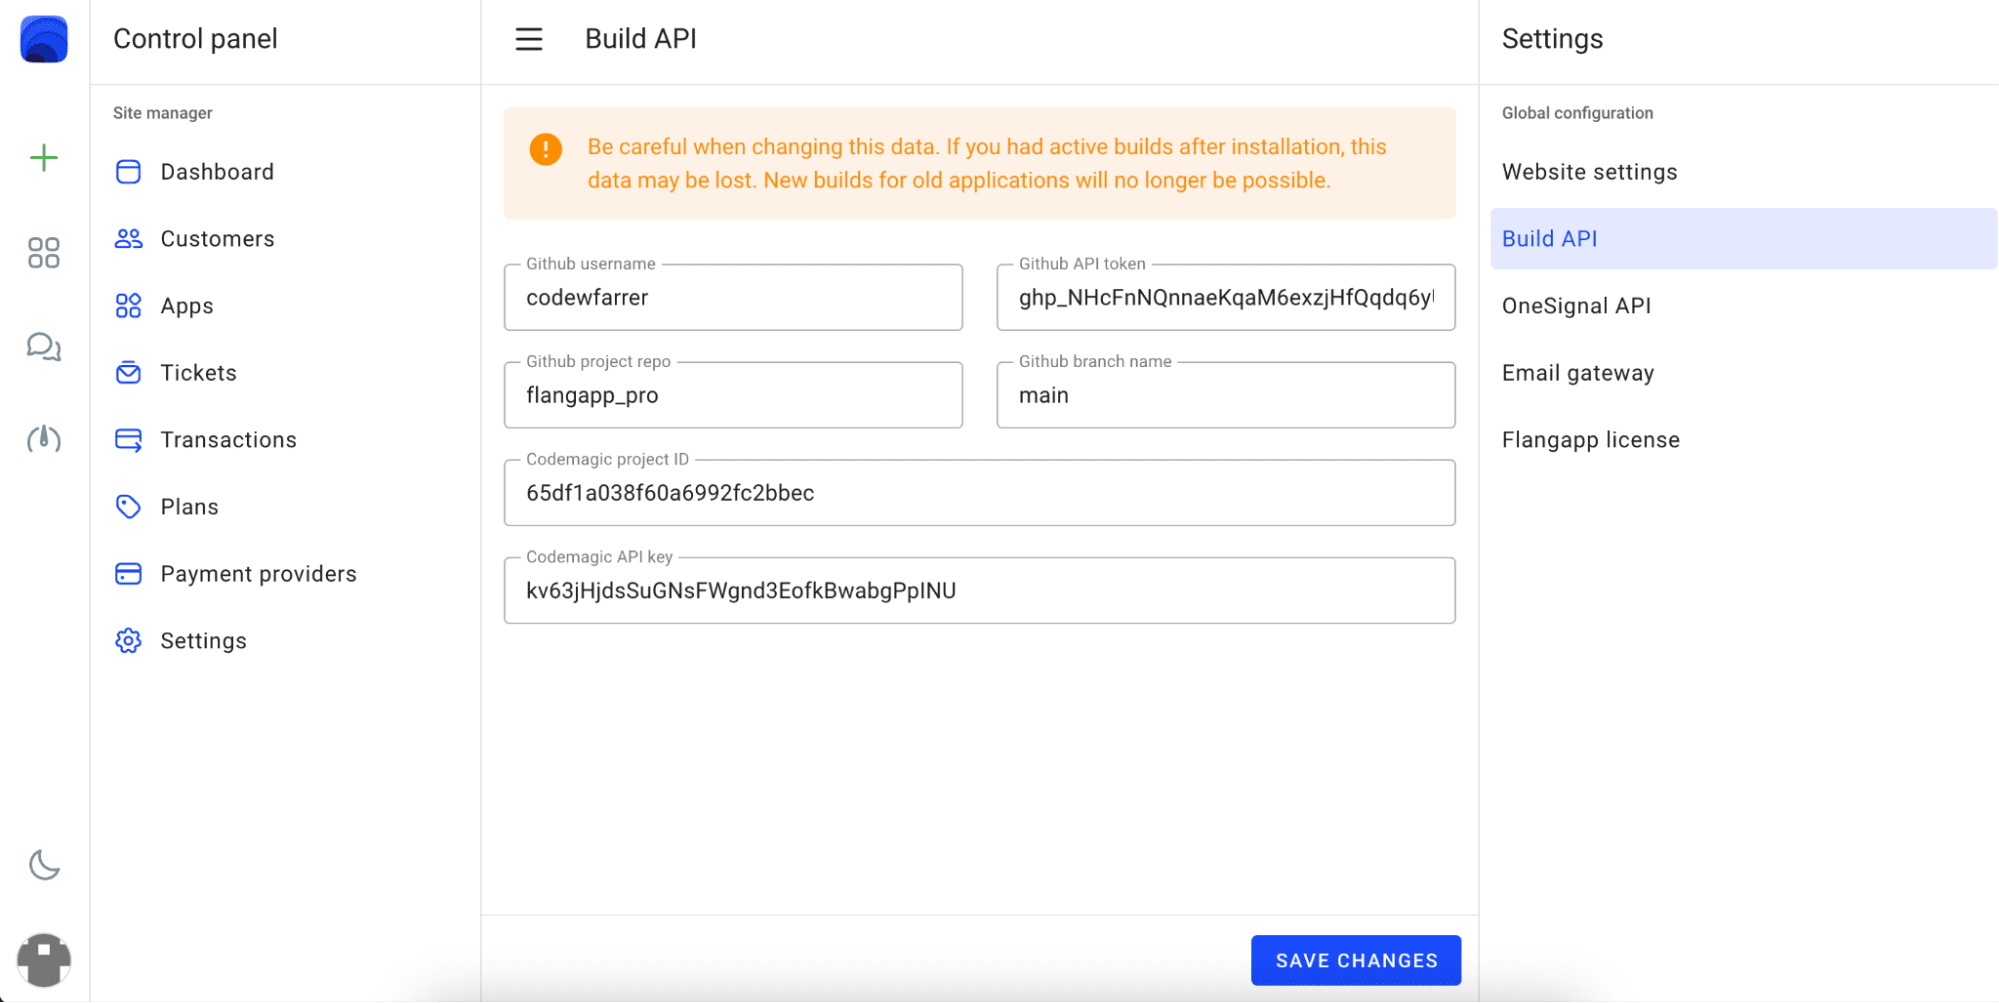
Click the “Show” button in the “Codemagic API” section. Copy and save the received API key. Go to Flangapp Dashboard - Settings - Build API. Paste the previously generated App ID and API key into the form:
Congratulations! You have successfully connected the API of the build and now you can move on to the next step of setting up your project configuration.