
Initial Setup
Start by logging in to your application with the administrator account you created above. On the first login you will see the Initial Setup Wizard. Complete the steps below to finish the initial configuration. You can revisit or change all values later in Dashboard — Settings.
Step 1 — License Activation
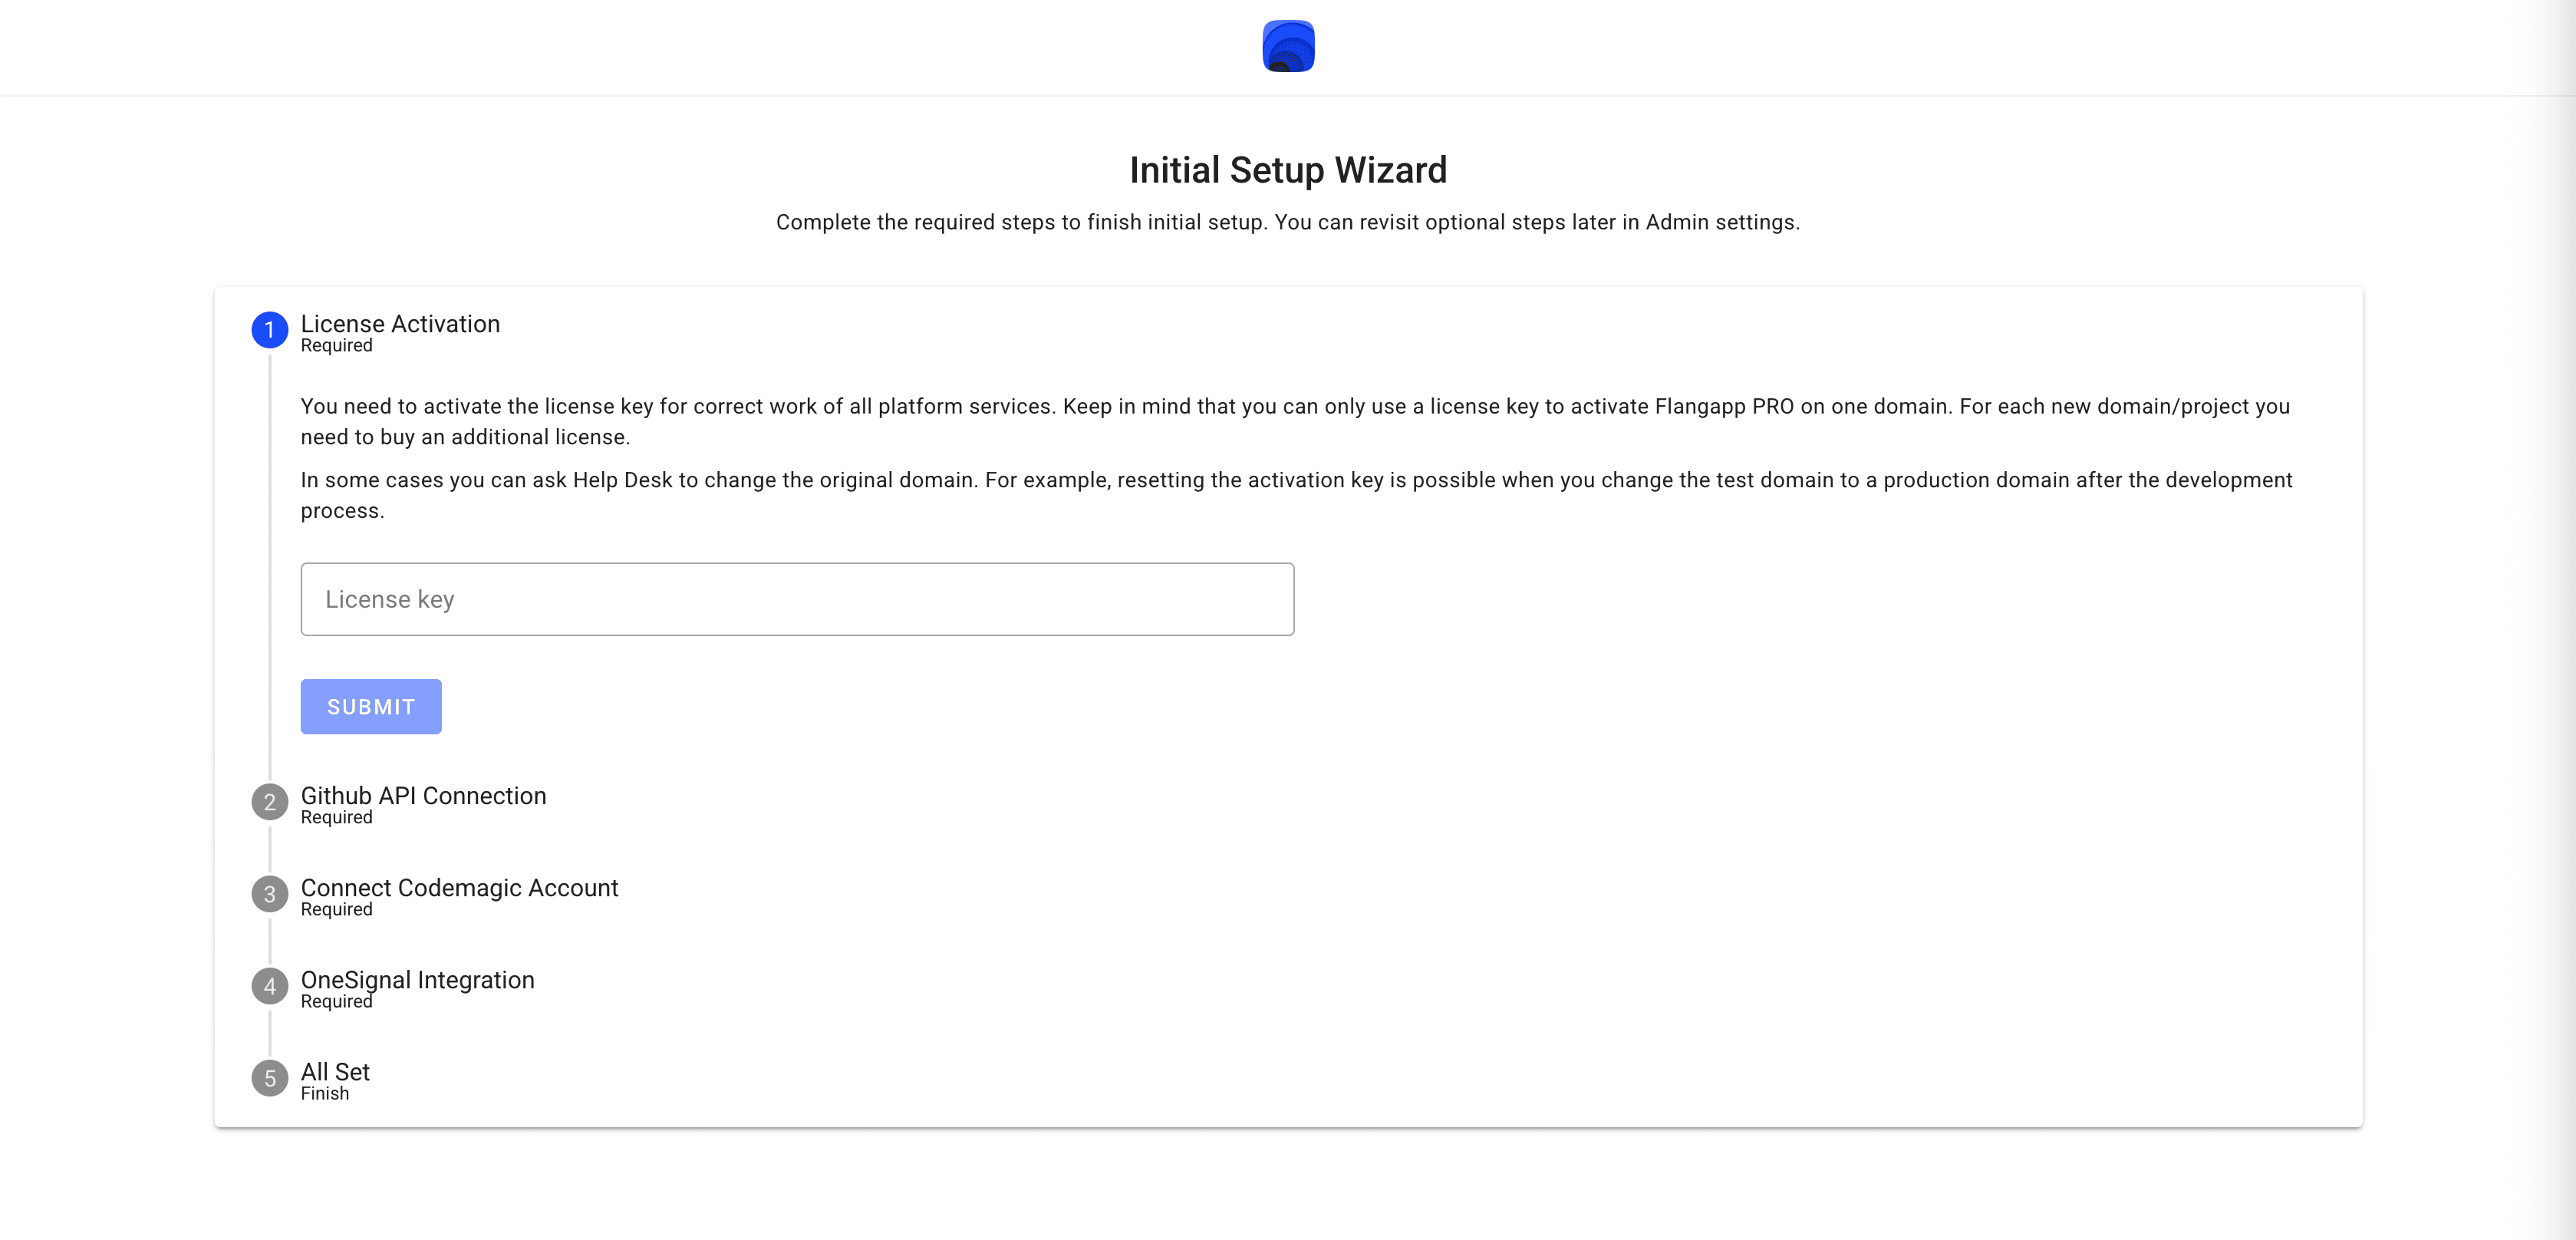
You need to activate the license key for correct work of all platform services. Keep in mind that you can only use a license key to activate Flangapp AI on one domain. For each new domain/project you need to buy an additional license.
In some cases you can ask Help Desk to change the original domain. For example, resetting the activation key is possible when you change the test domain to a production domain after the development process.
Step 2 — GitHub API Connection
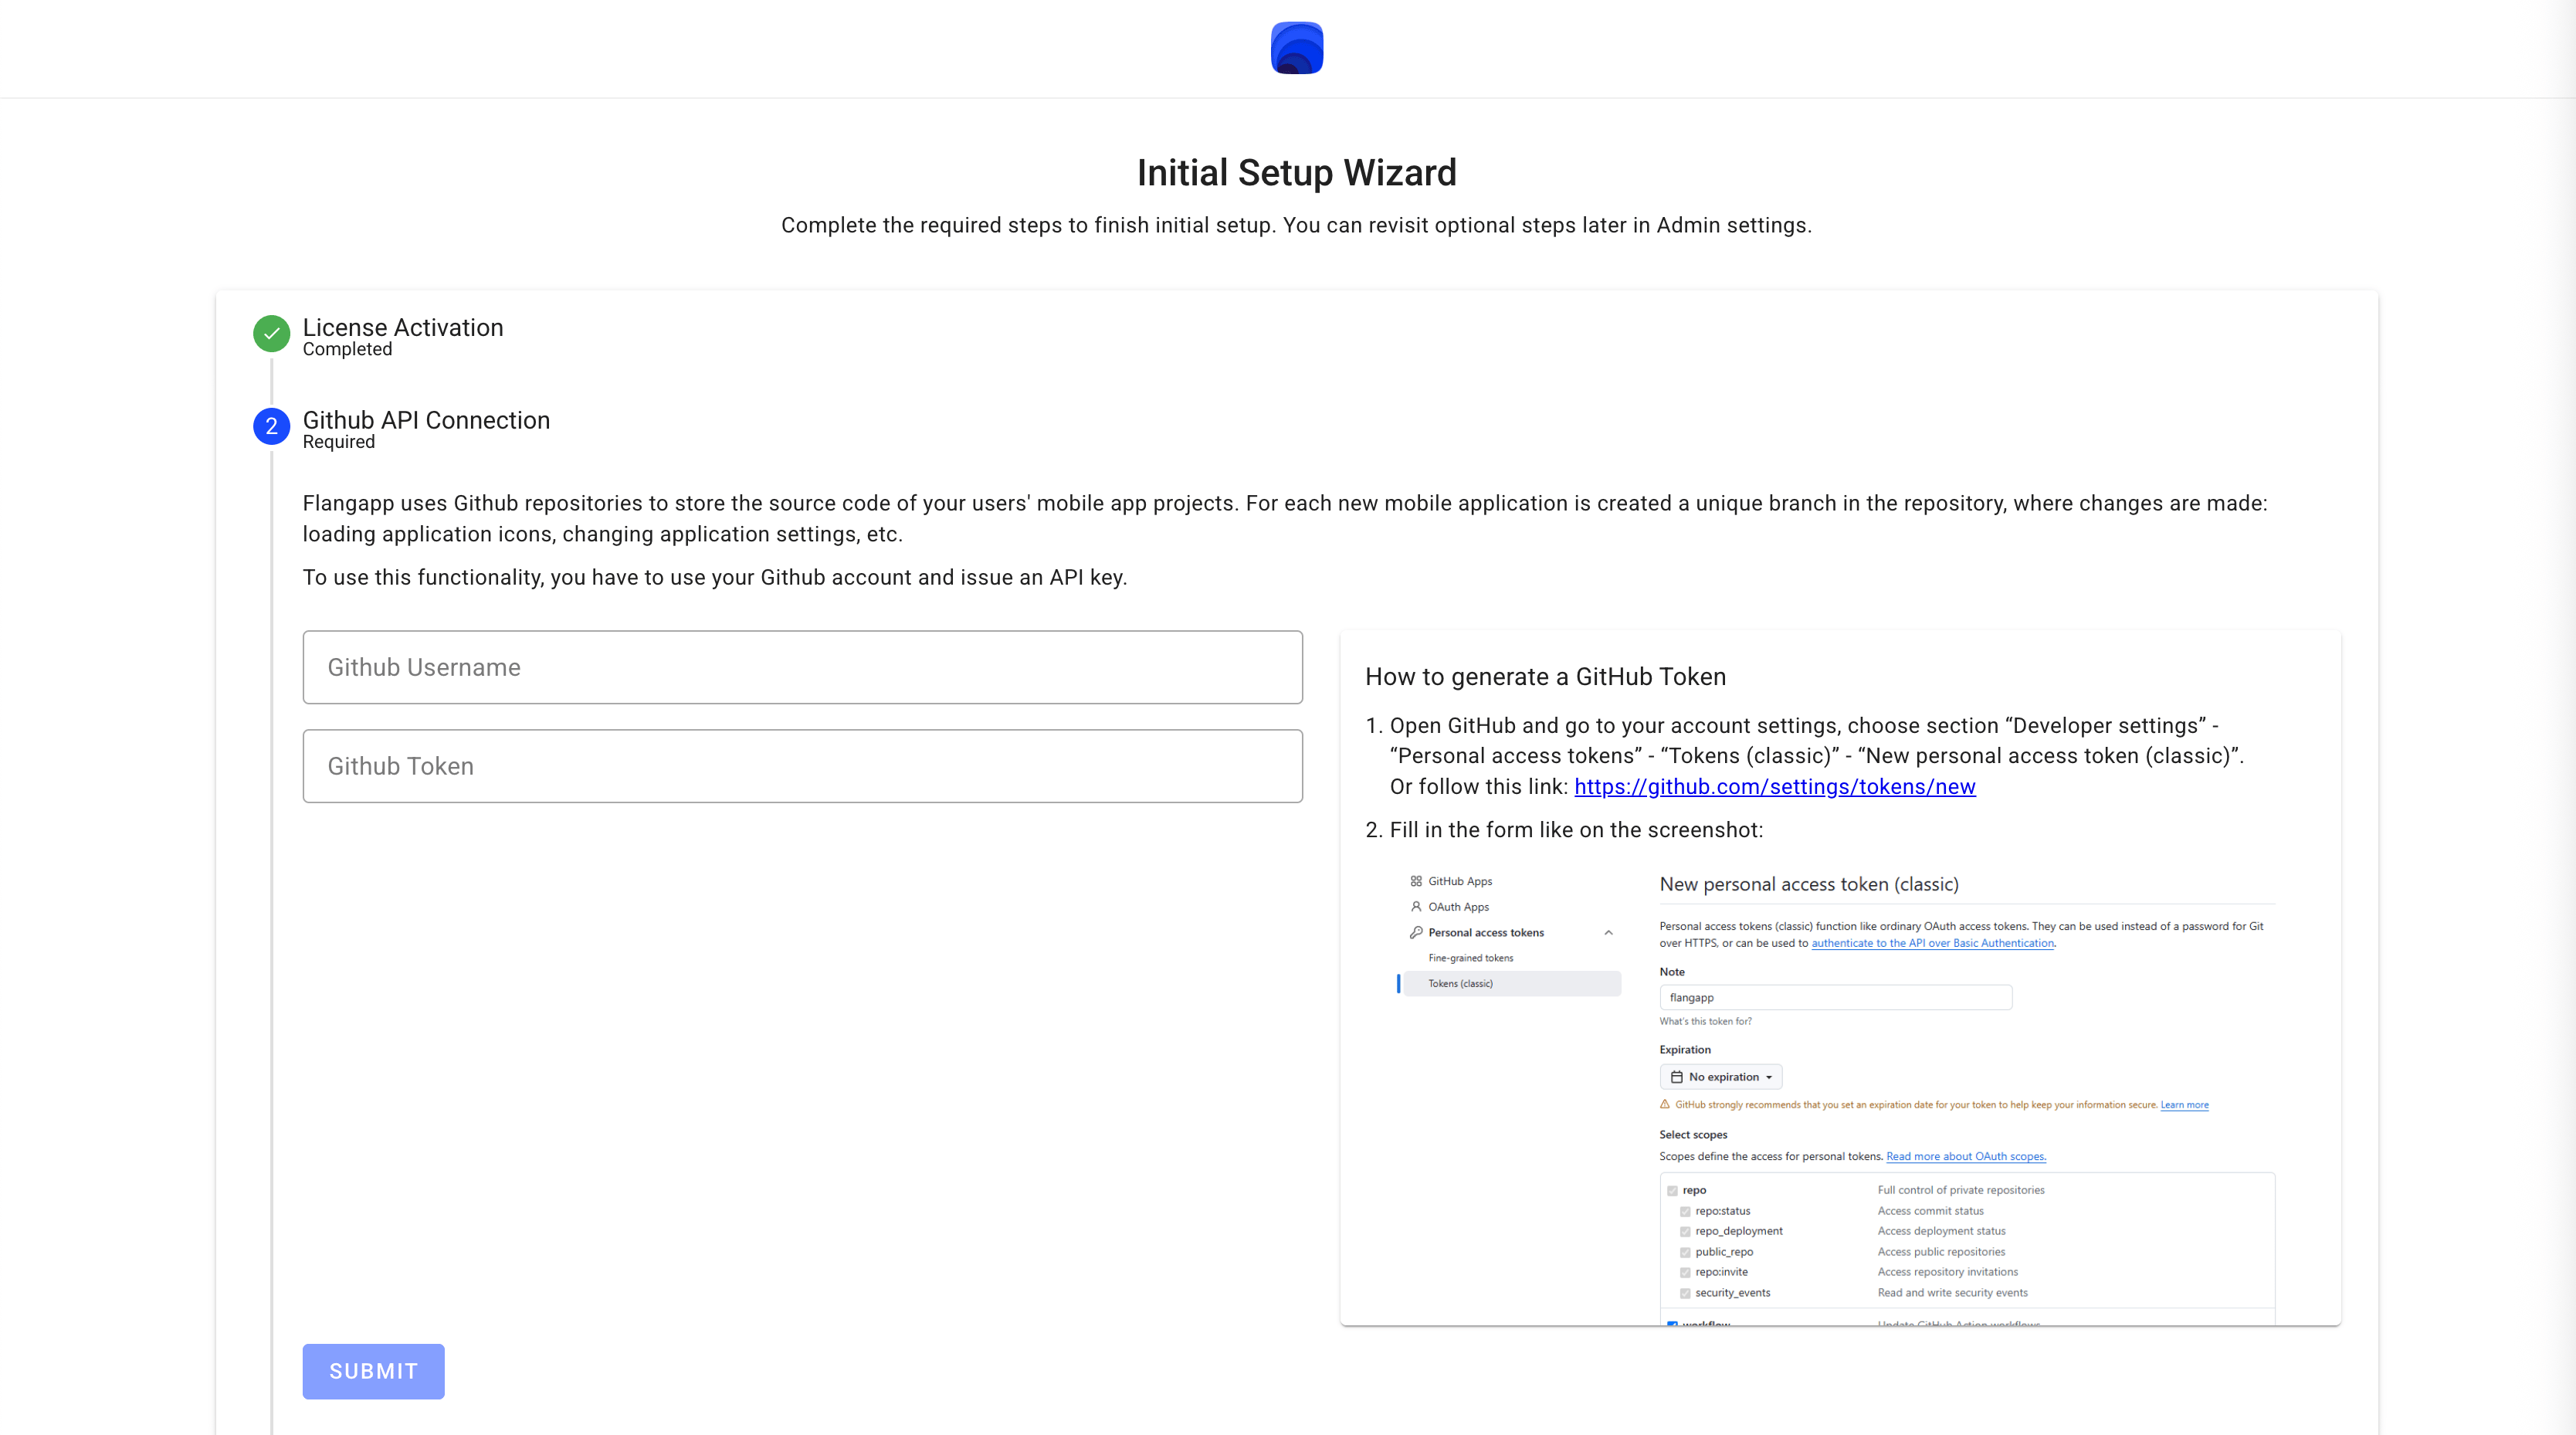
Flangapp uses GitHub repositories to store the source code of your users' mobile app projects. For each new mobile application a unique branch is created in the repository, where changes are made: loading application icons, changing application settings, etc.
To use this functionality, you have to use your GitHub account and issue an API key.
How to generate a GitHub Token
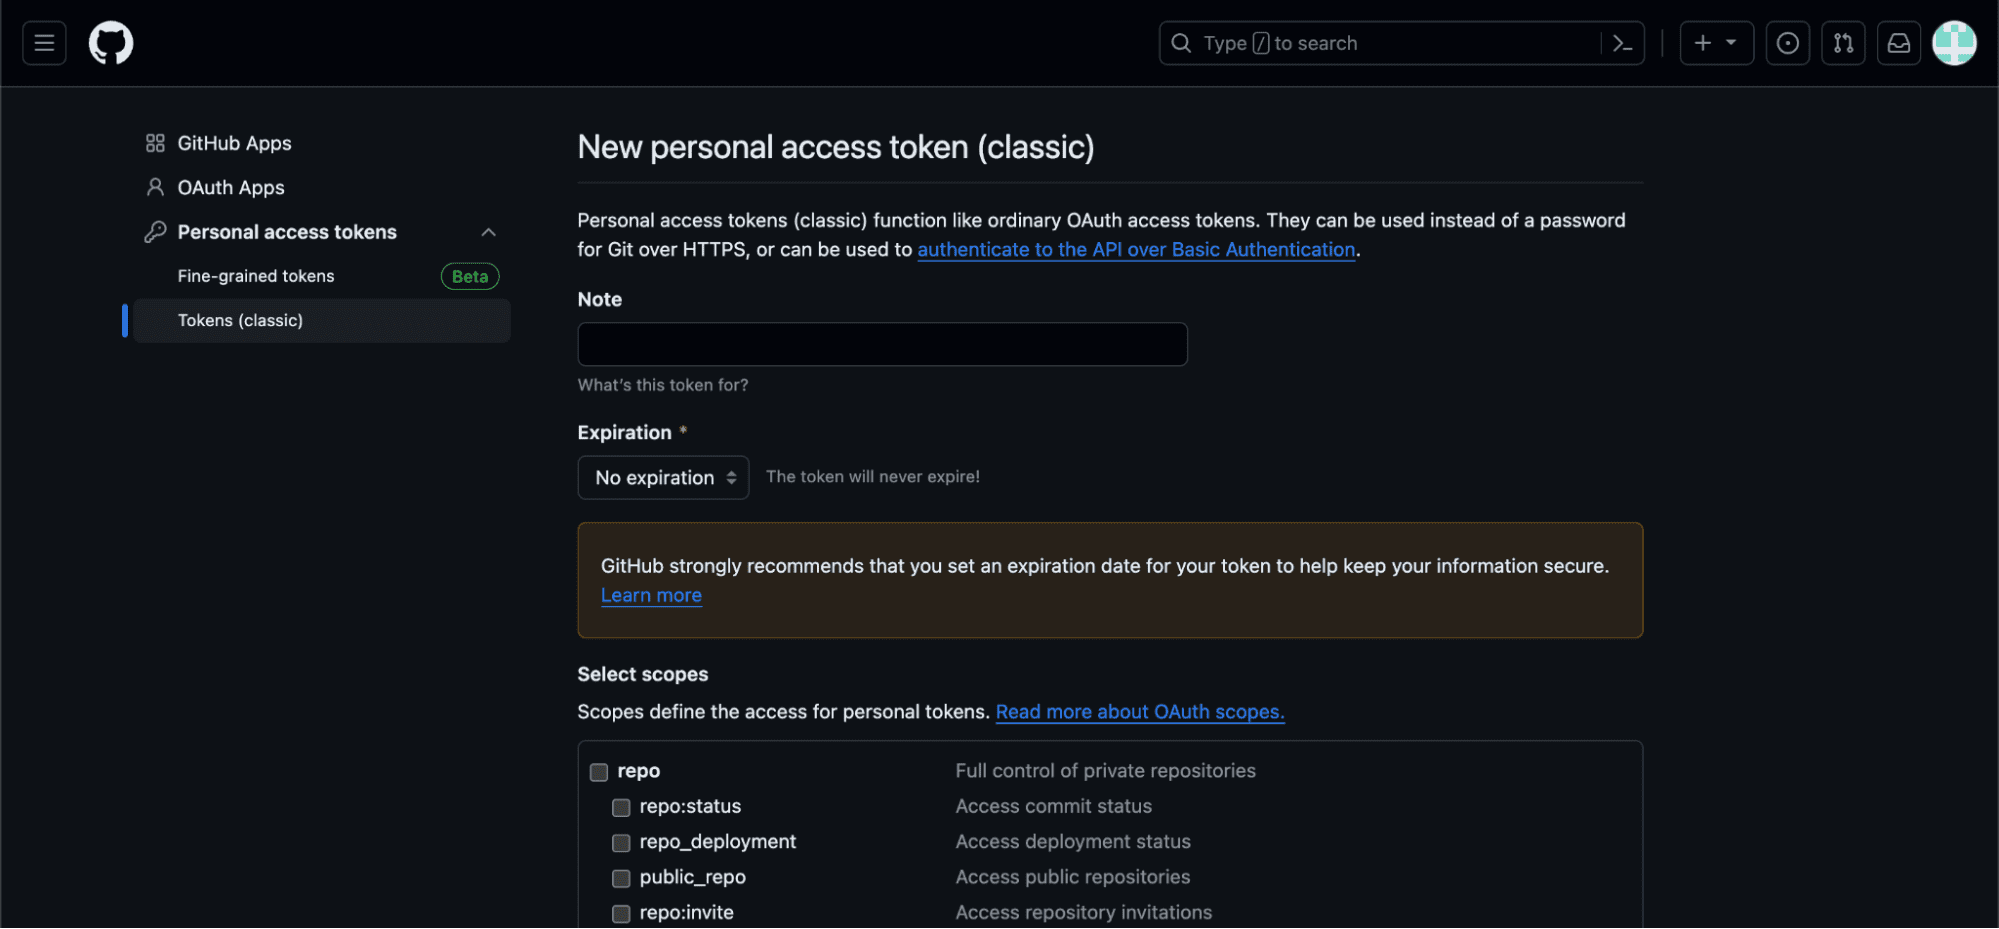
- Open GitHub and go to your account settings, choose section “Developer settings” → “Personal access tokens” → “Tokens (classic)” → “New personal access token (classic)”. Or follow this link: https://github.com/settings/tokens/new
- Fill in the form:
- 1. Enter any name for your token, for example “My Flangapp AI”.
- 2. Expiration: choose “No expiration”.
- 3. Select scopes: repo:status, repo_deployment, public_repo, repo:invite, security_events, workflow.
- Click the “Generate token” button and copy the received key.
Step 3 — Connect Codemagic Account
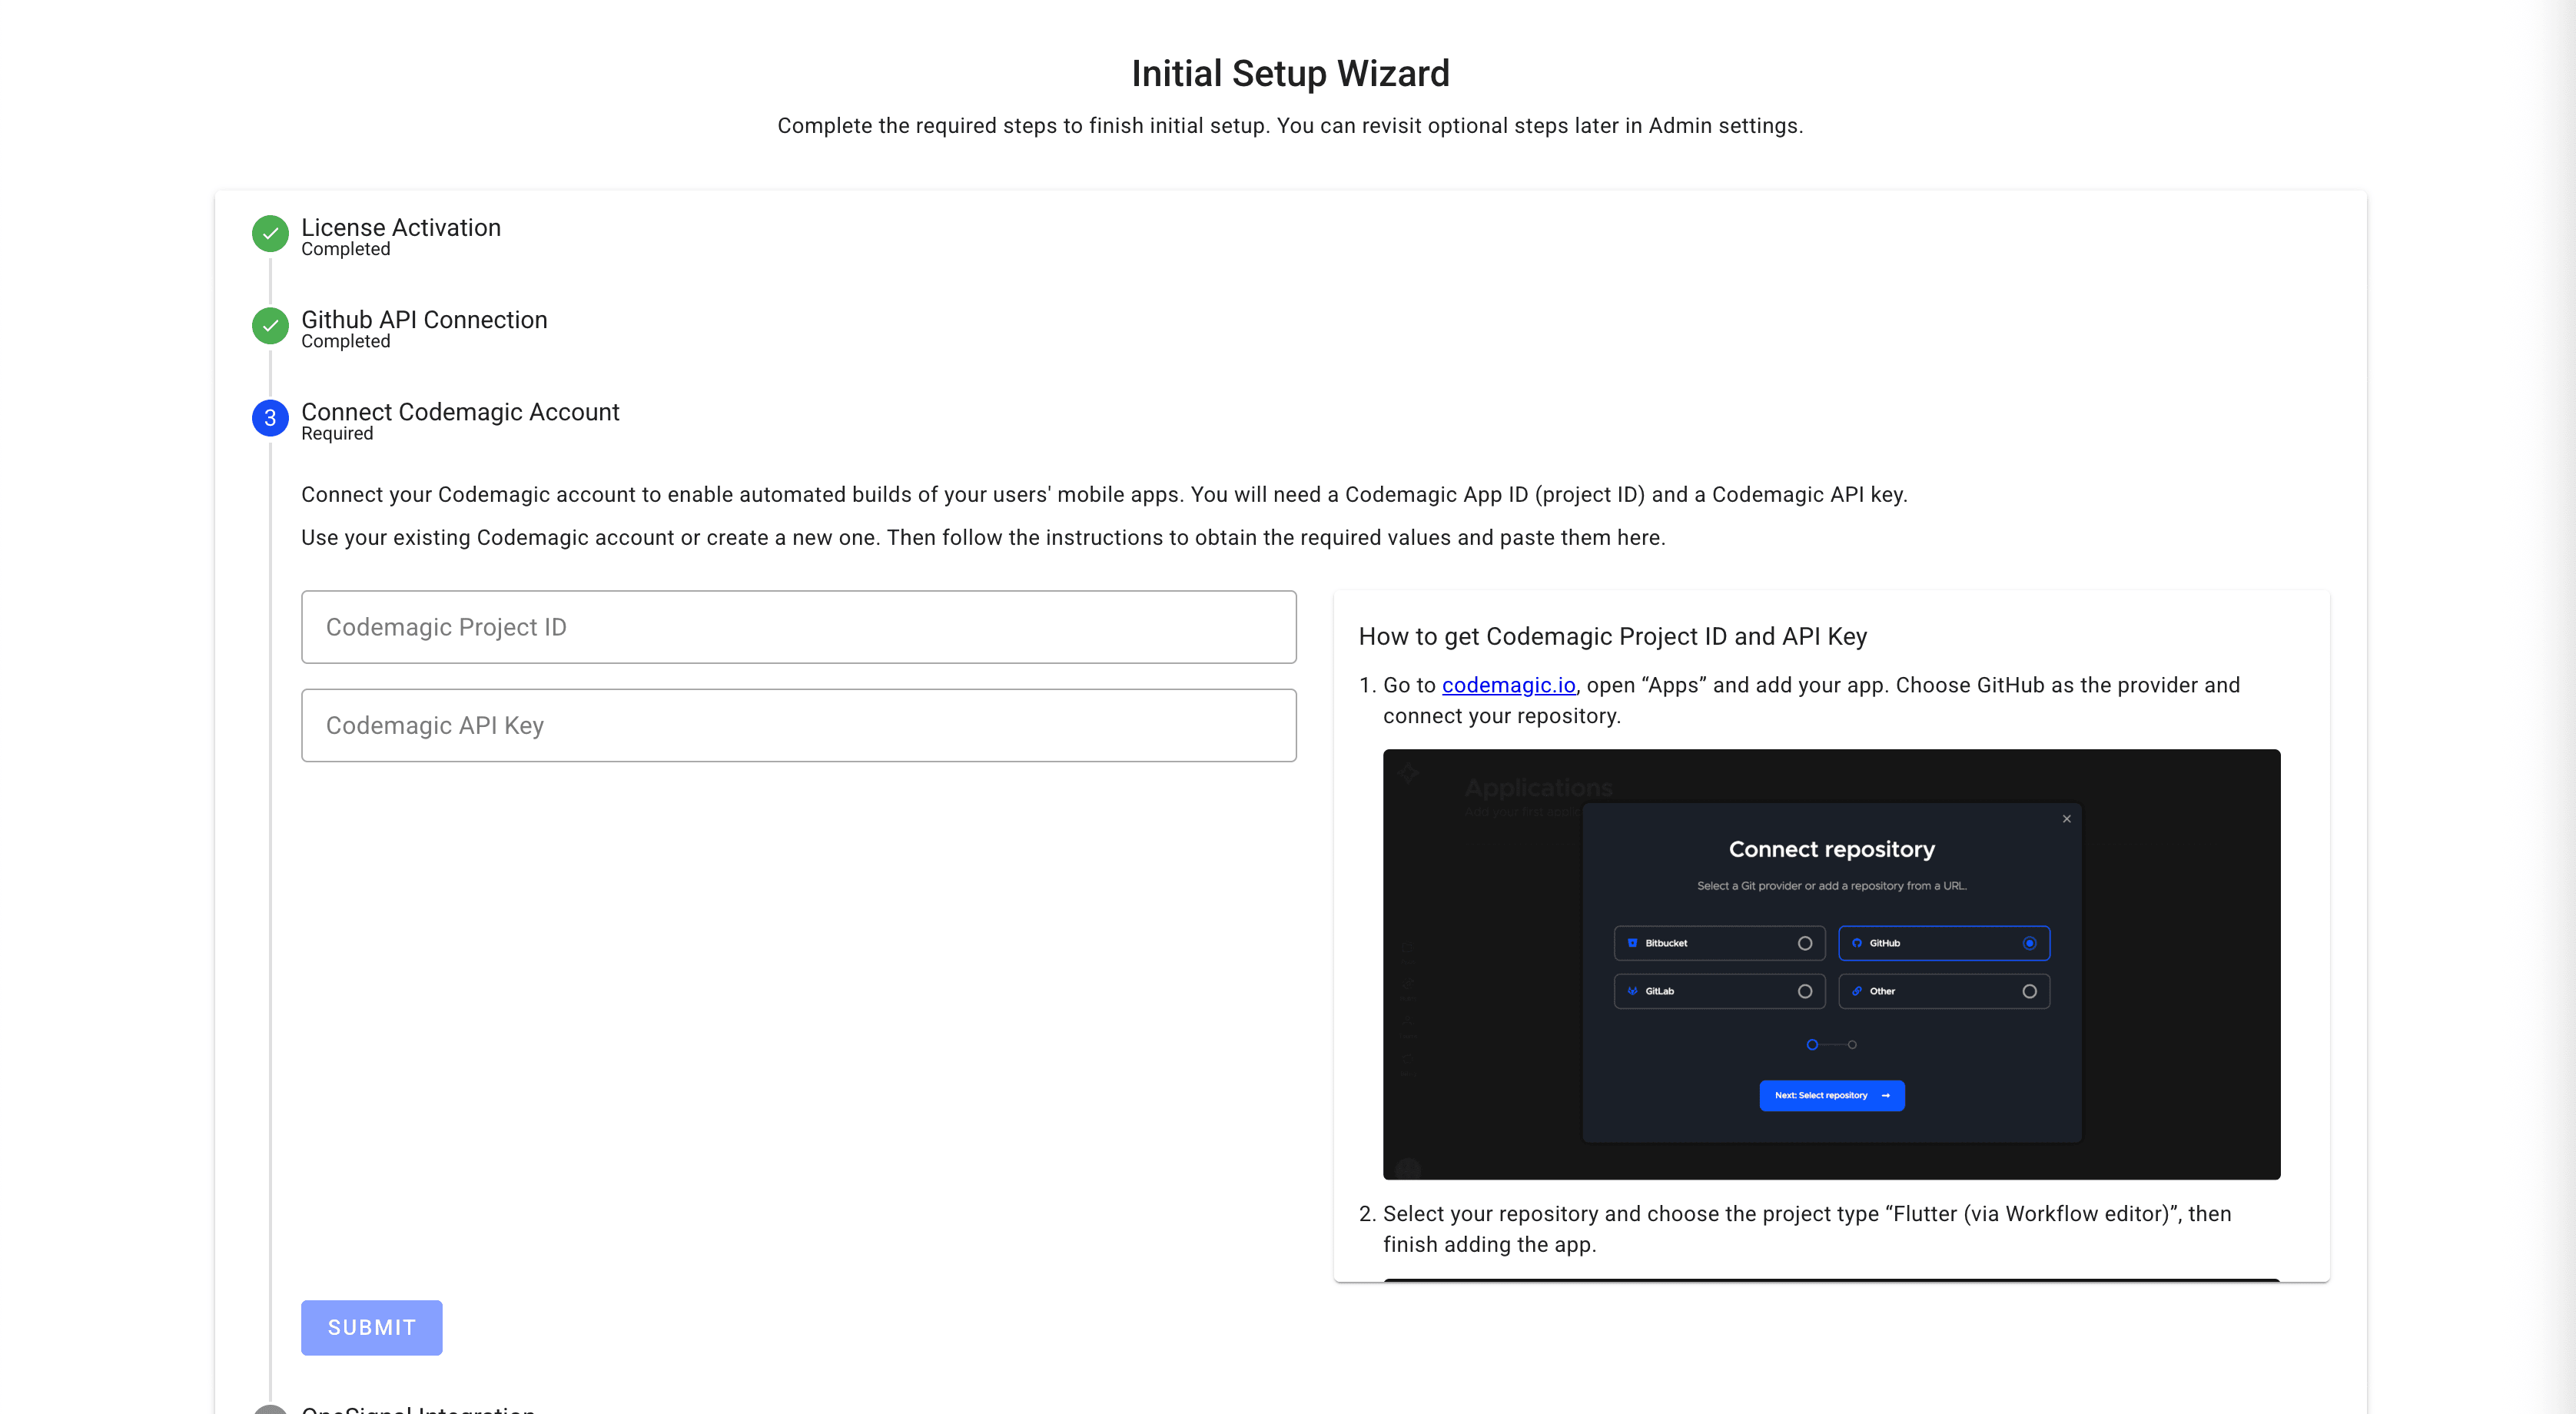
Connect your Codemagic account to enable automated builds of your users' mobile apps. You will need a Codemagic App ID (project ID) and a Codemagic API key.
Use your existing Codemagic account or create a new one. Then follow the instructions to obtain the required values and paste them here.
How to get Codemagic Project ID and API Key
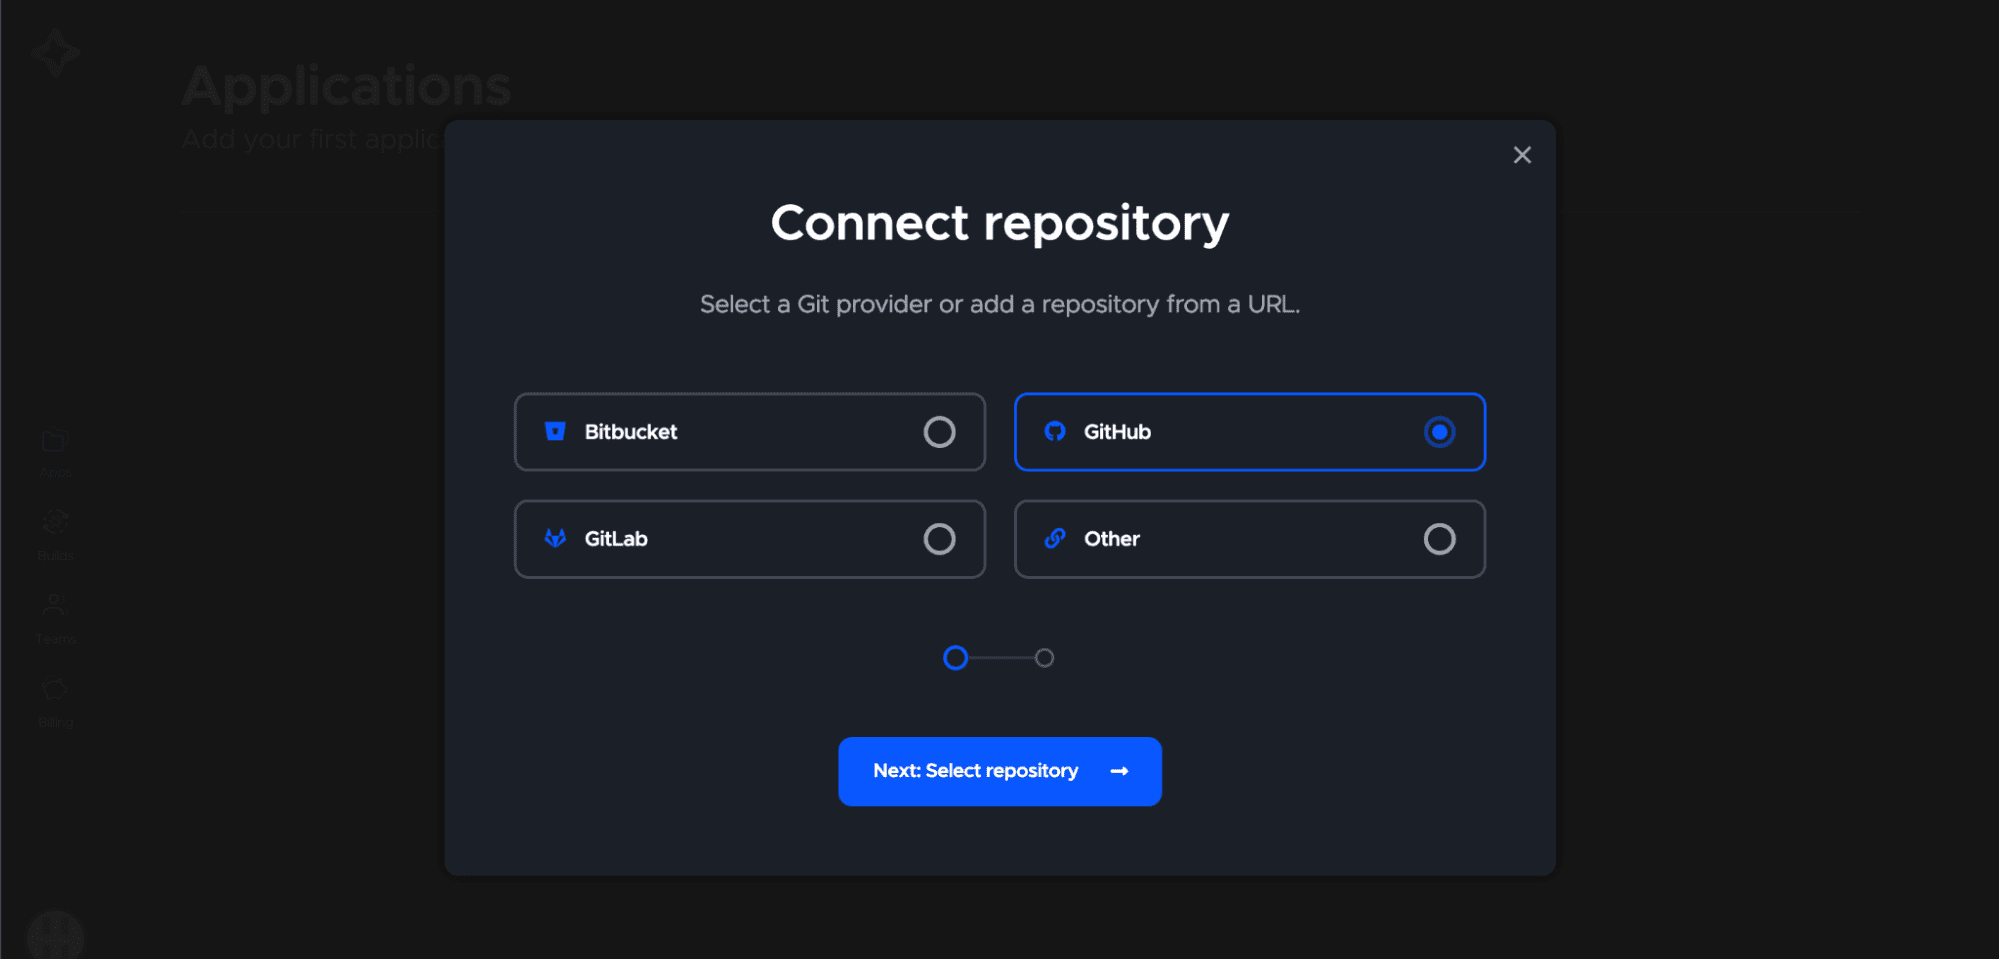
- Go to codemagic.io, open “Apps” and add your app. Choose GitHub as the provider and connect your repository.
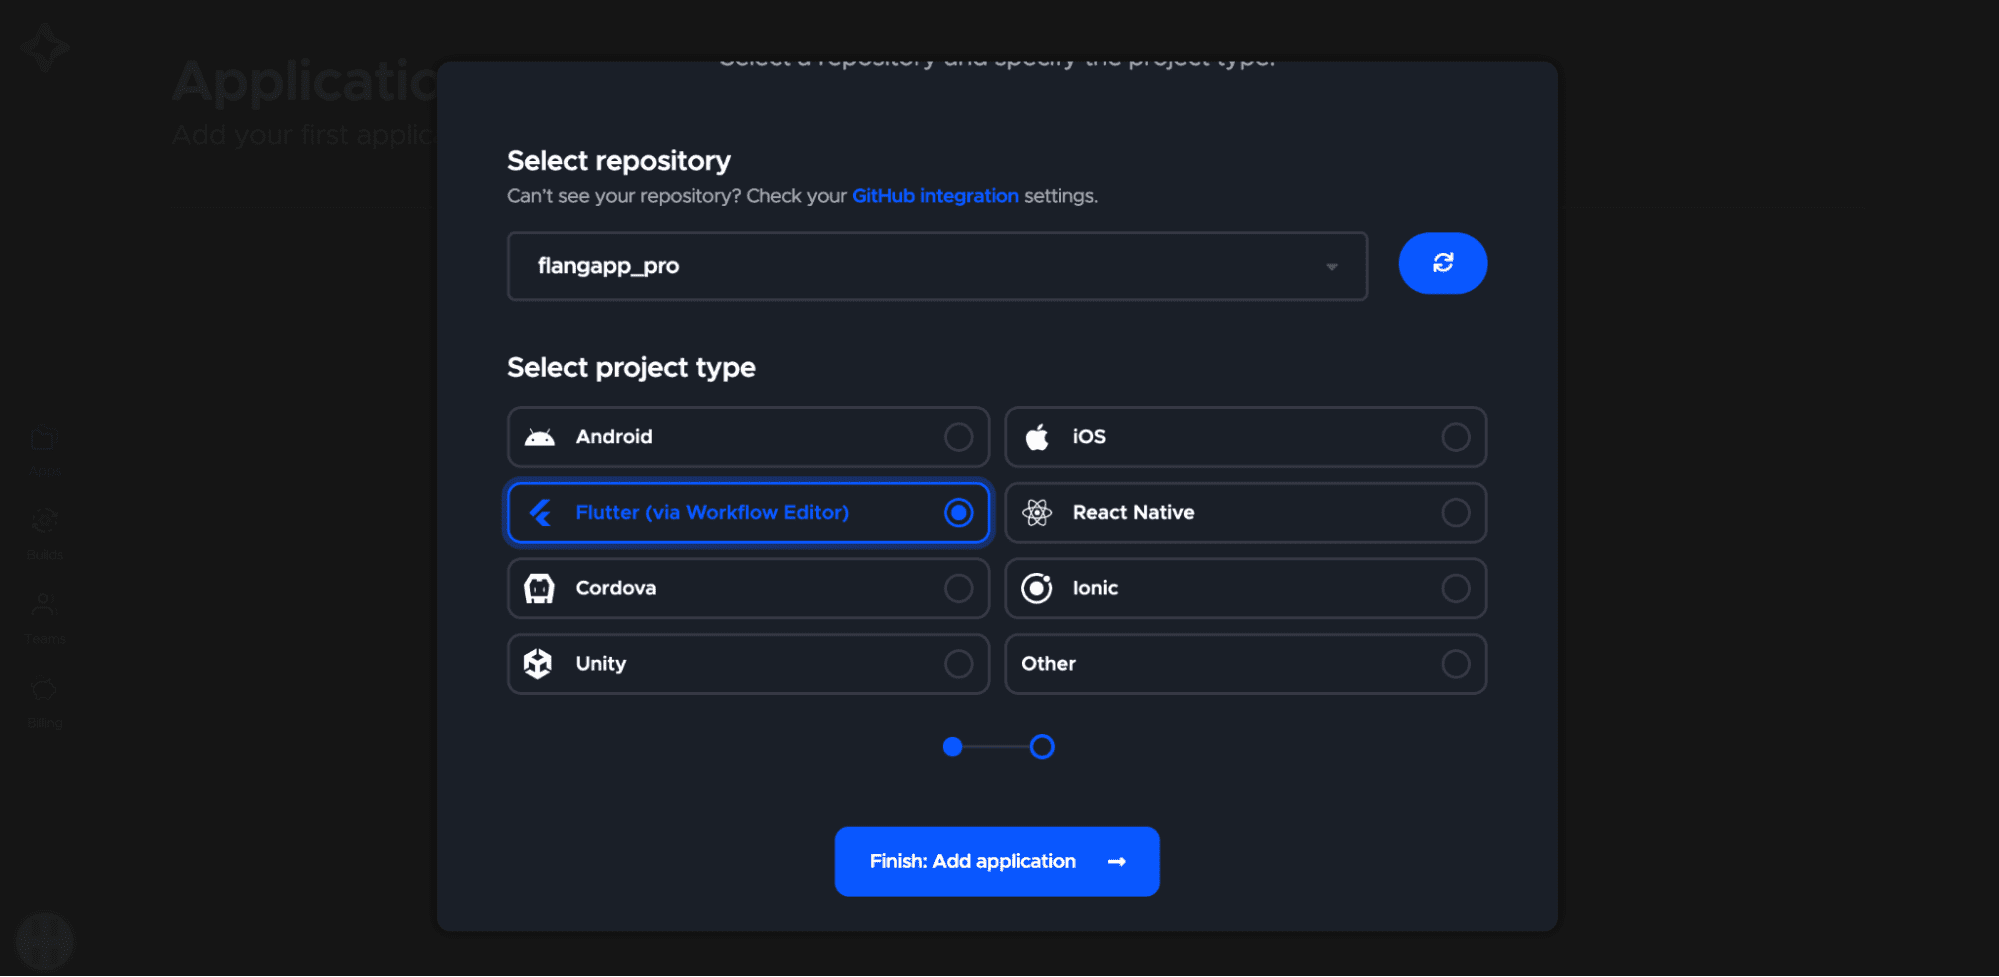
- Select your repository and choose the project type “Flutter (via Workflow editor)”, then finish adding the app.
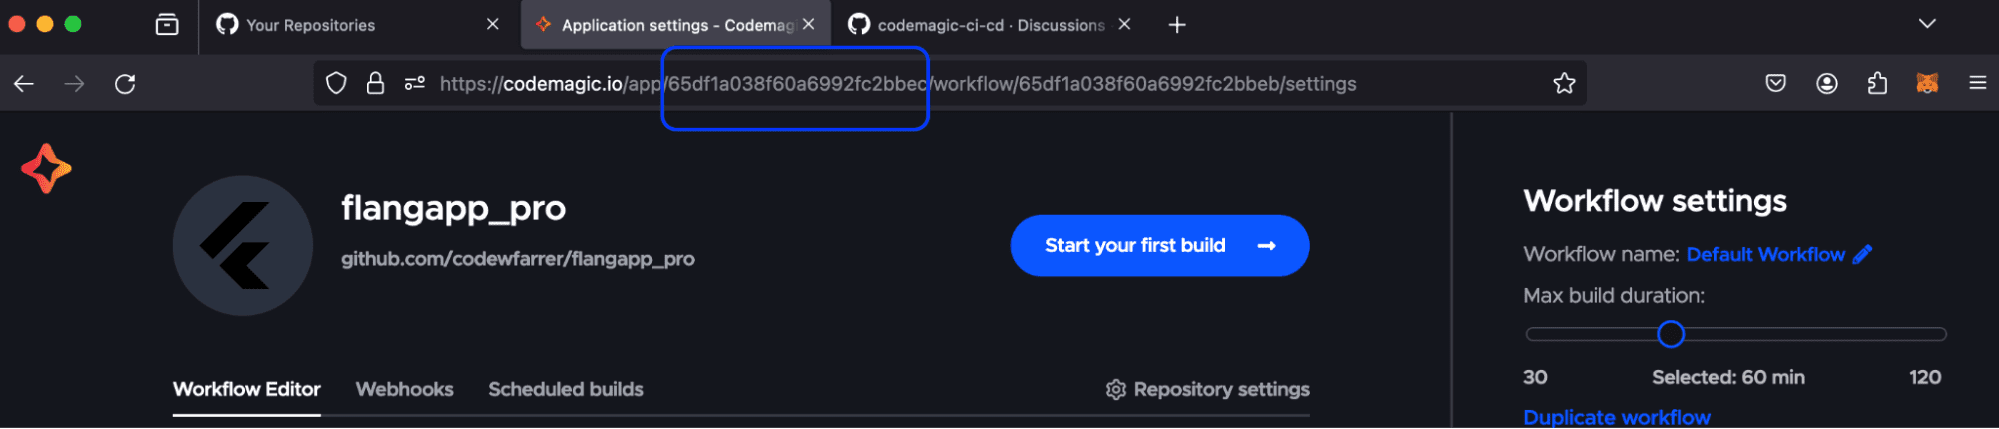
- Open the new app’s settings. Copy the App ID (Project ID) from the browser address bar.
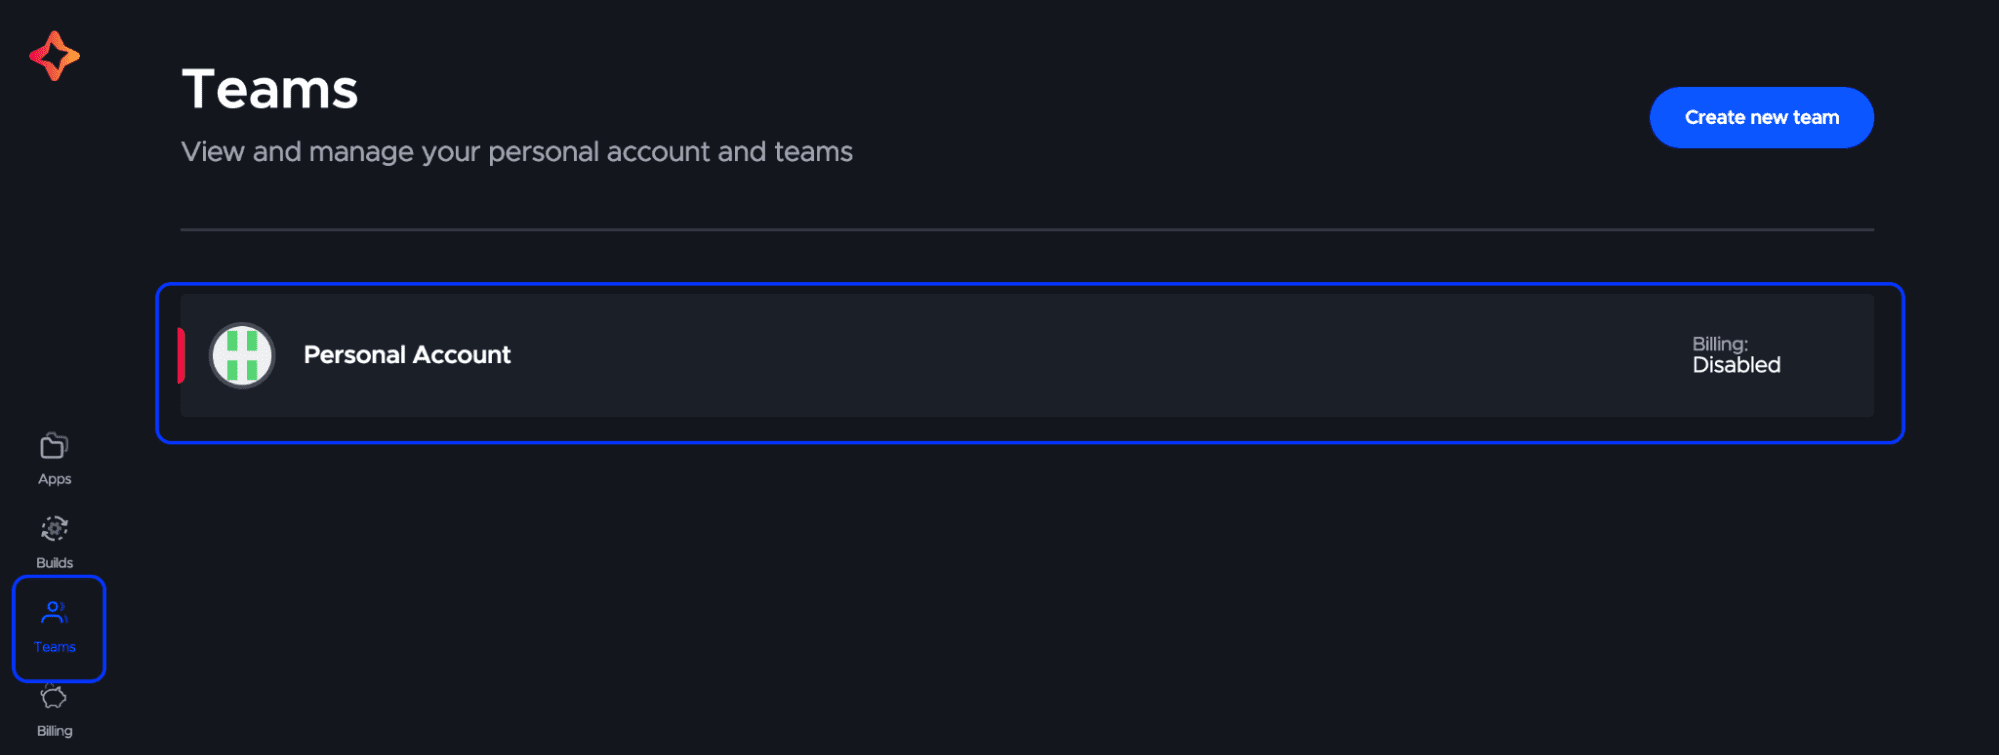
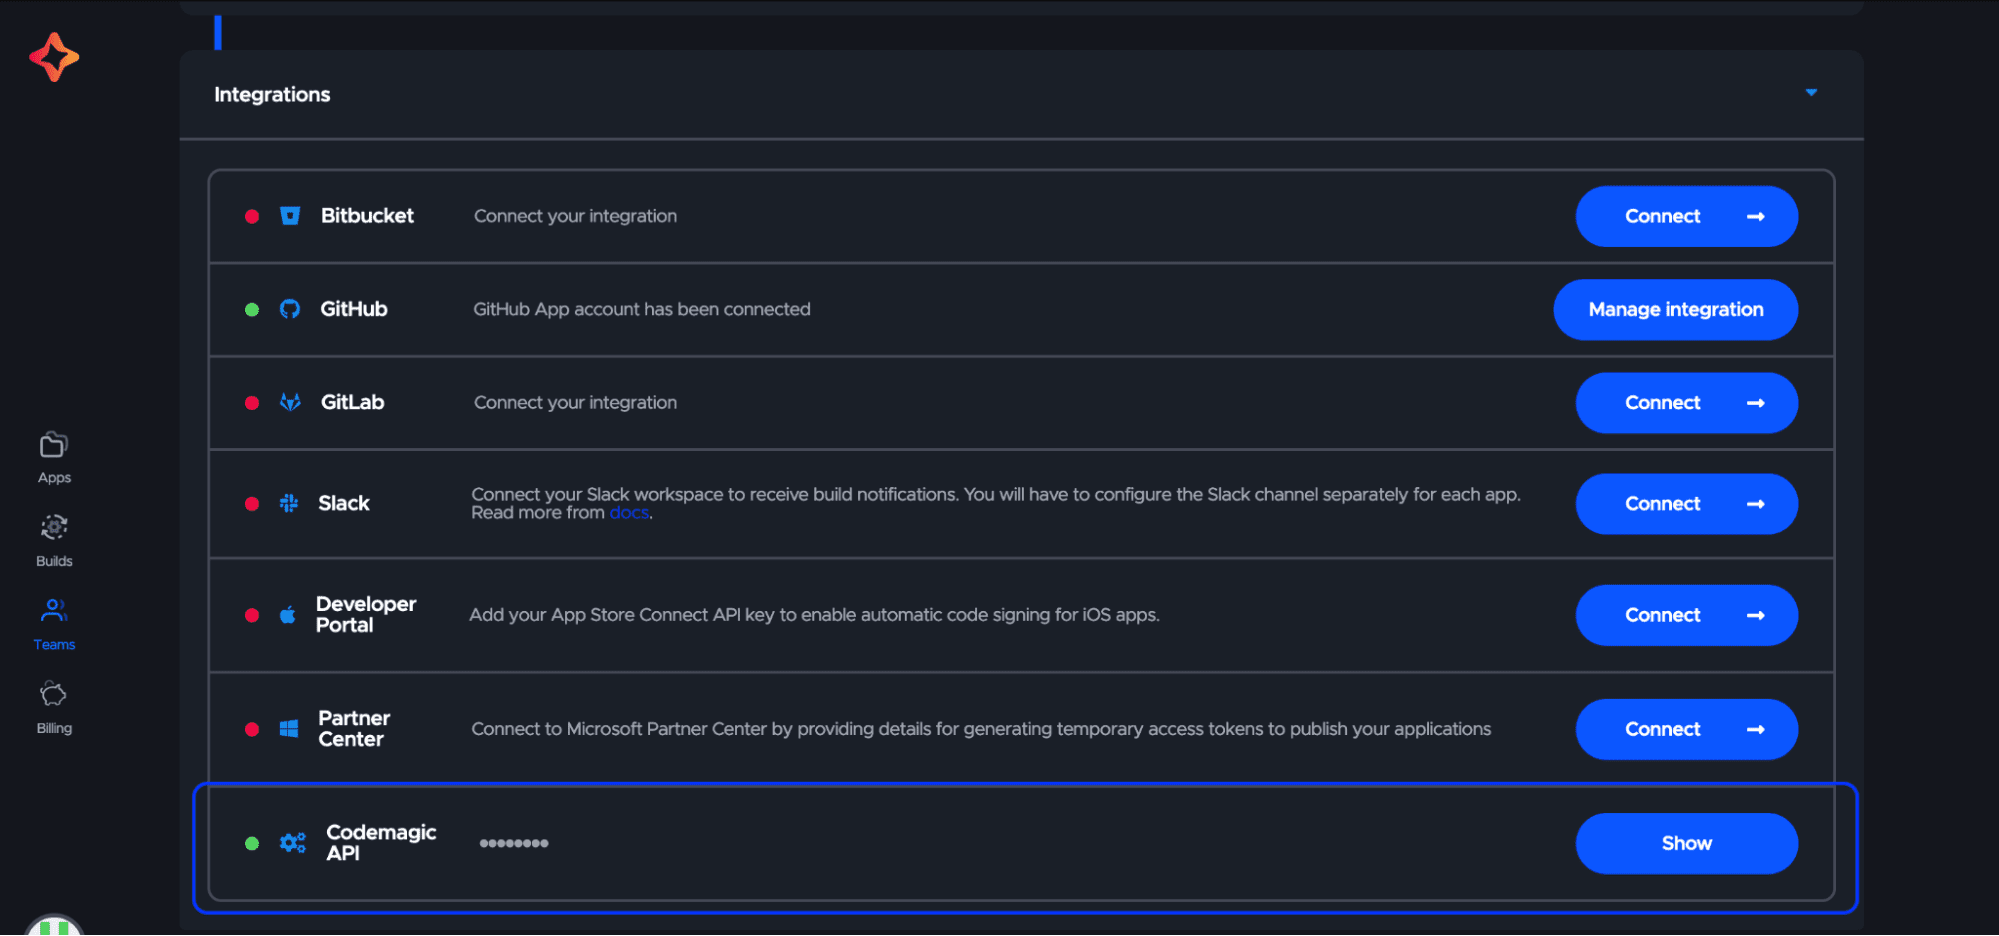
- In “Team” → “Personal account” → “Integrations”, locate “Codemagic API” and click “Show”. Copy the API key.
- Paste the App ID and API key into the form.
Step 4 — OneSignal Integration
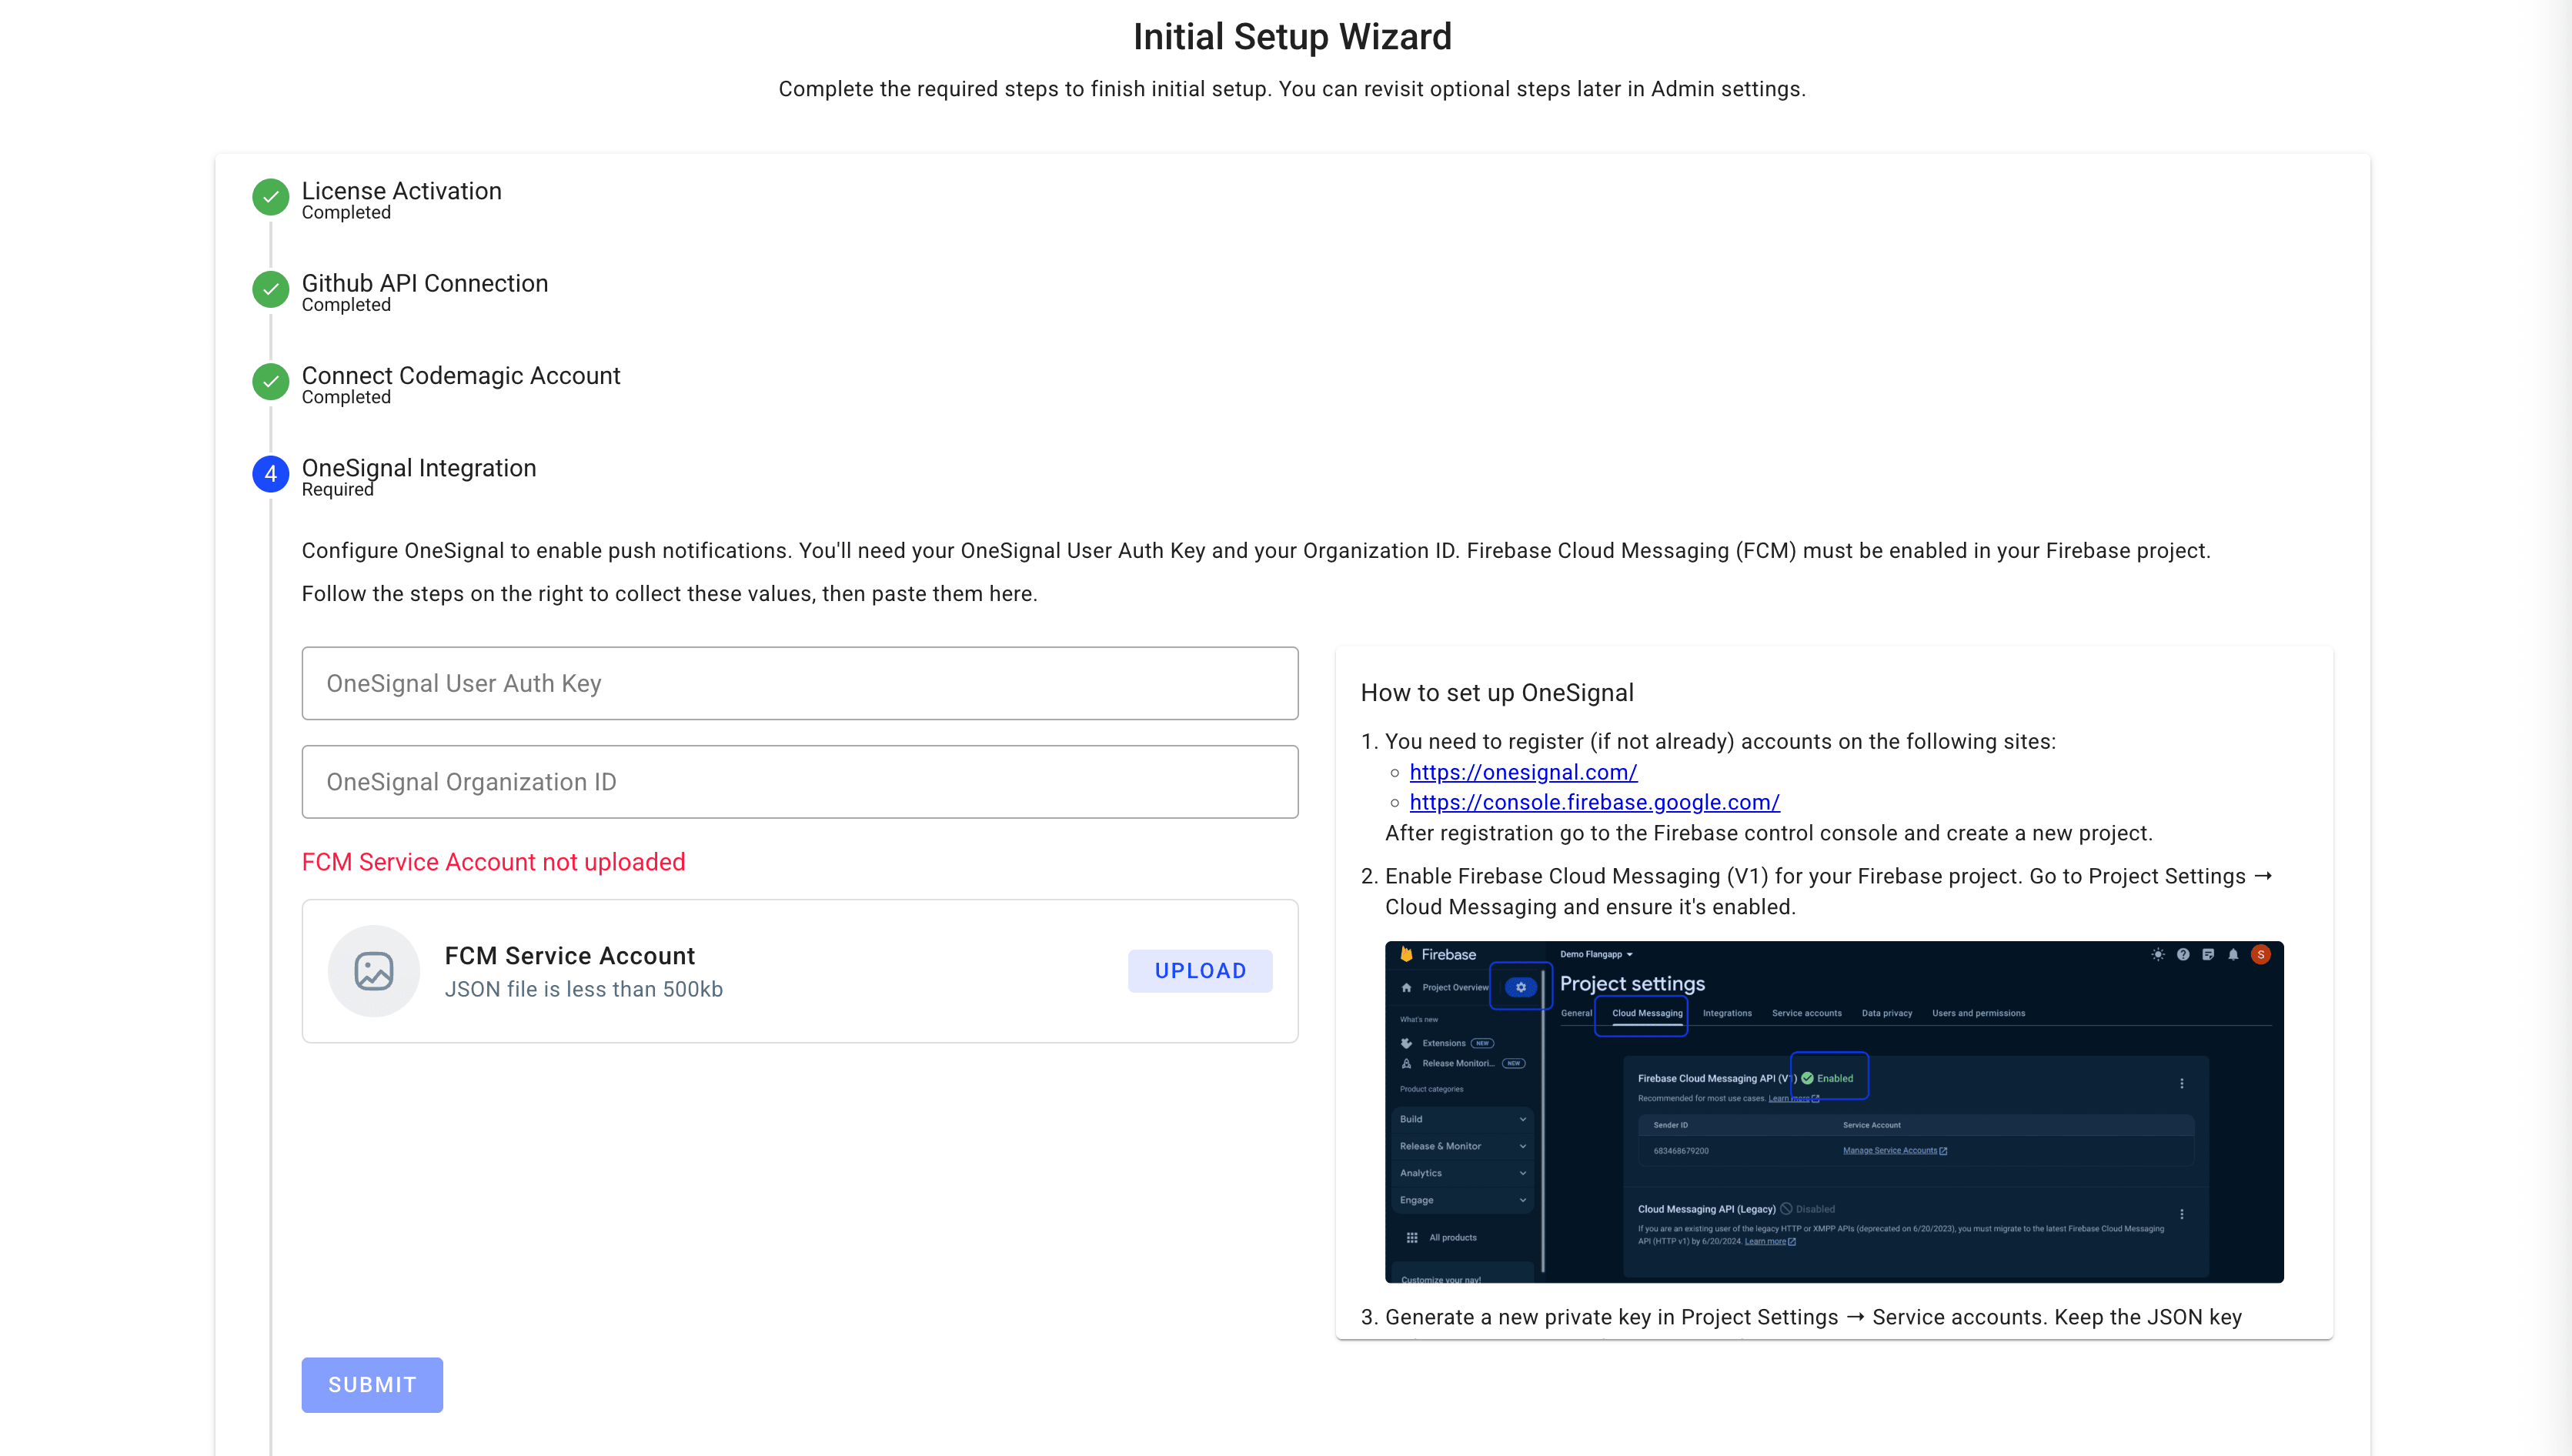
Configure OneSignal to enable push notifications. You'll need your OneSignal User Auth Key and your Organization ID. Firebase Cloud Messaging (FCM) must be enabled in your Firebase project.
Follow the steps below to collect these values, then paste them here.
How to set up OneSignal
- You need to register (if not already) accounts on the following sites:
- https://onesignal.com/
- https://console.firebase.google.com/
- After registration go to the Firebase control console and create a new project.
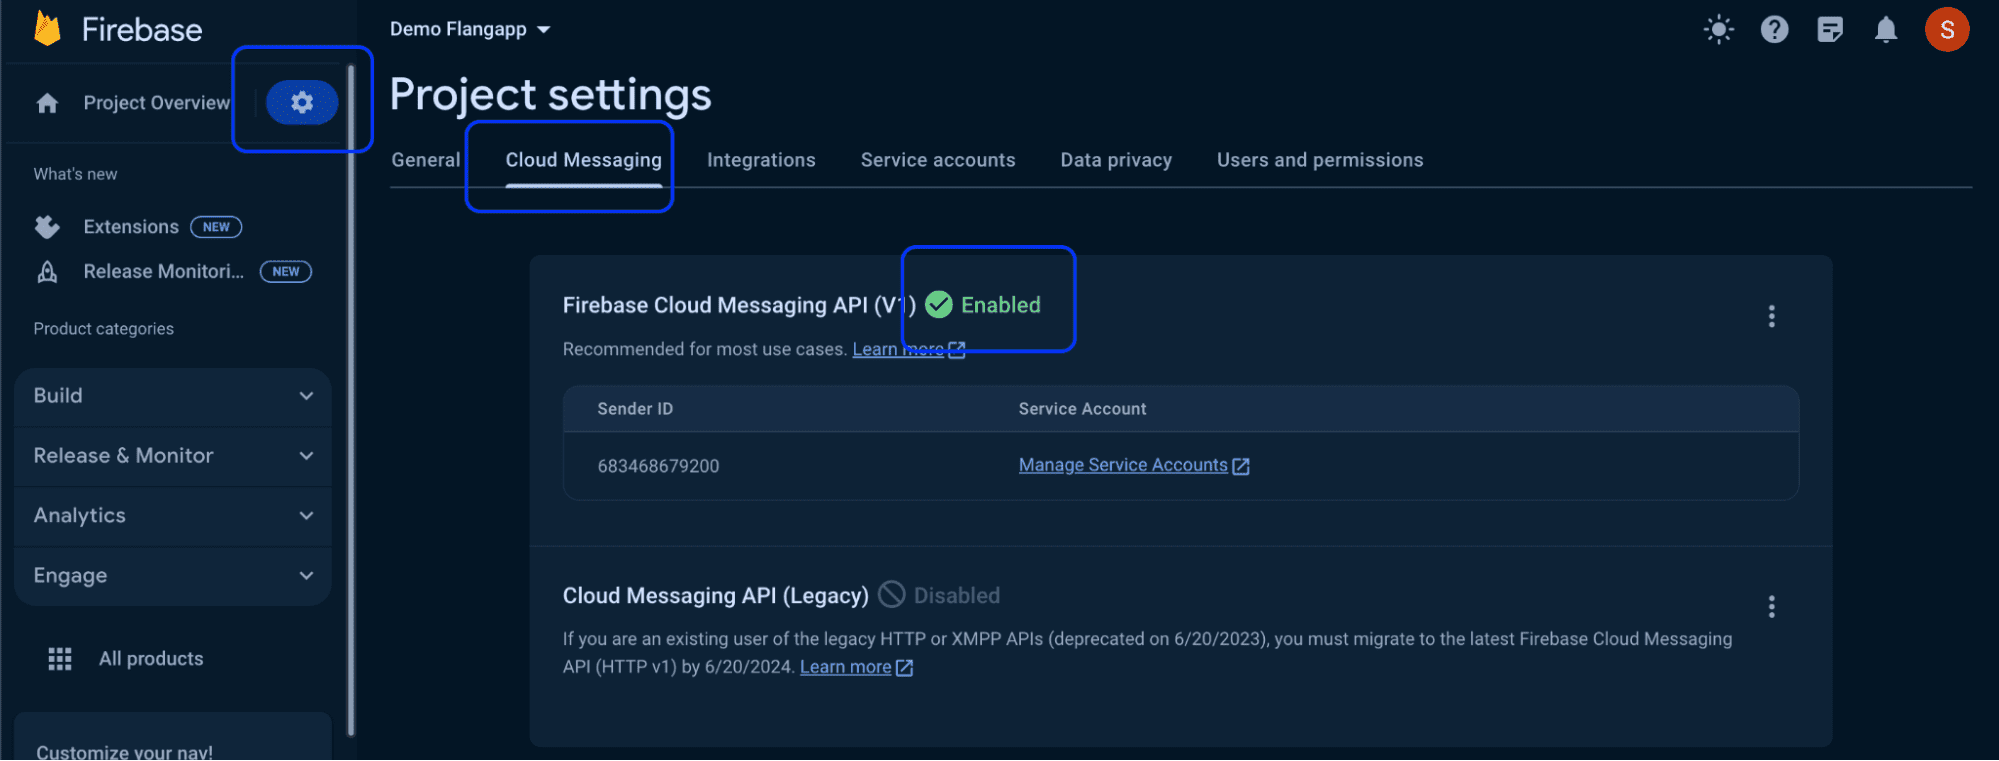
- Enable Firebase Cloud Messaging (V1) for your Firebase project. Go to Project settings → Cloud Messaging and ensure it's enabled.
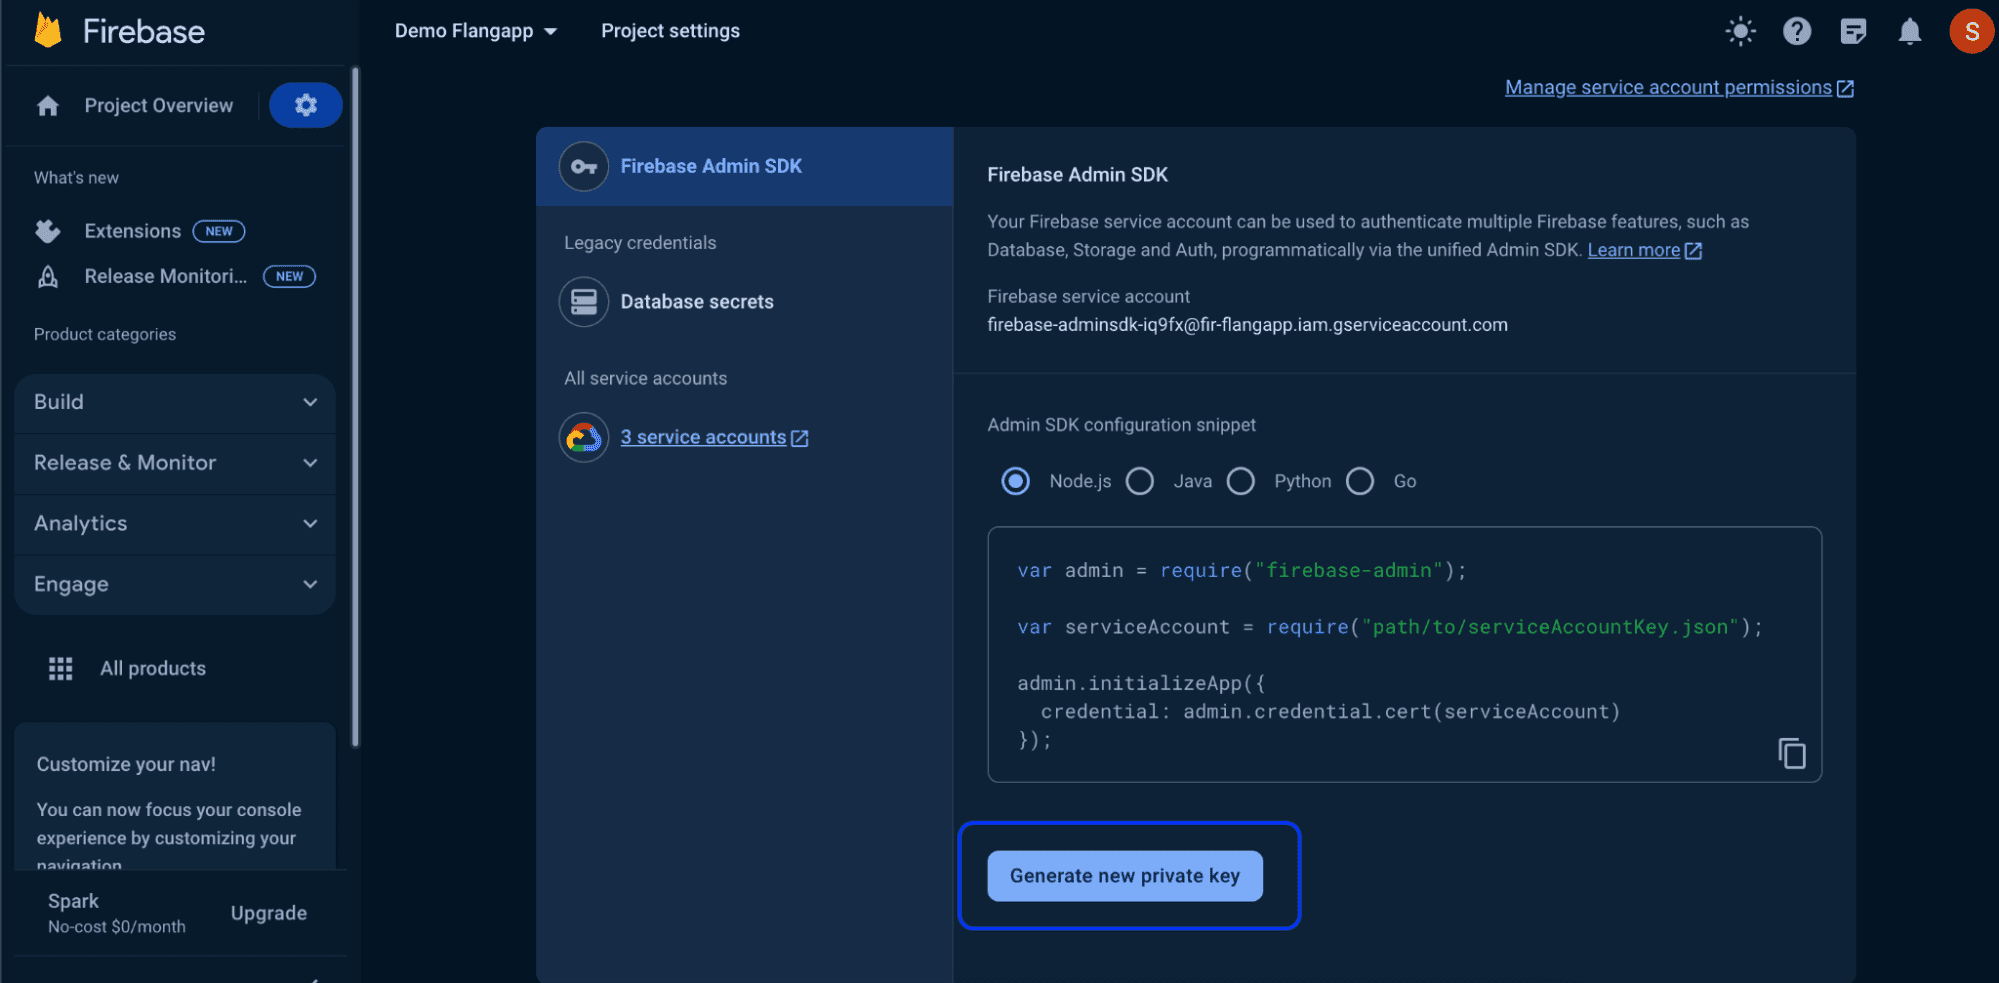
- Generate a new private key in Project settings → Service accounts. Keep the JSON key safe and upload it in the wizard.
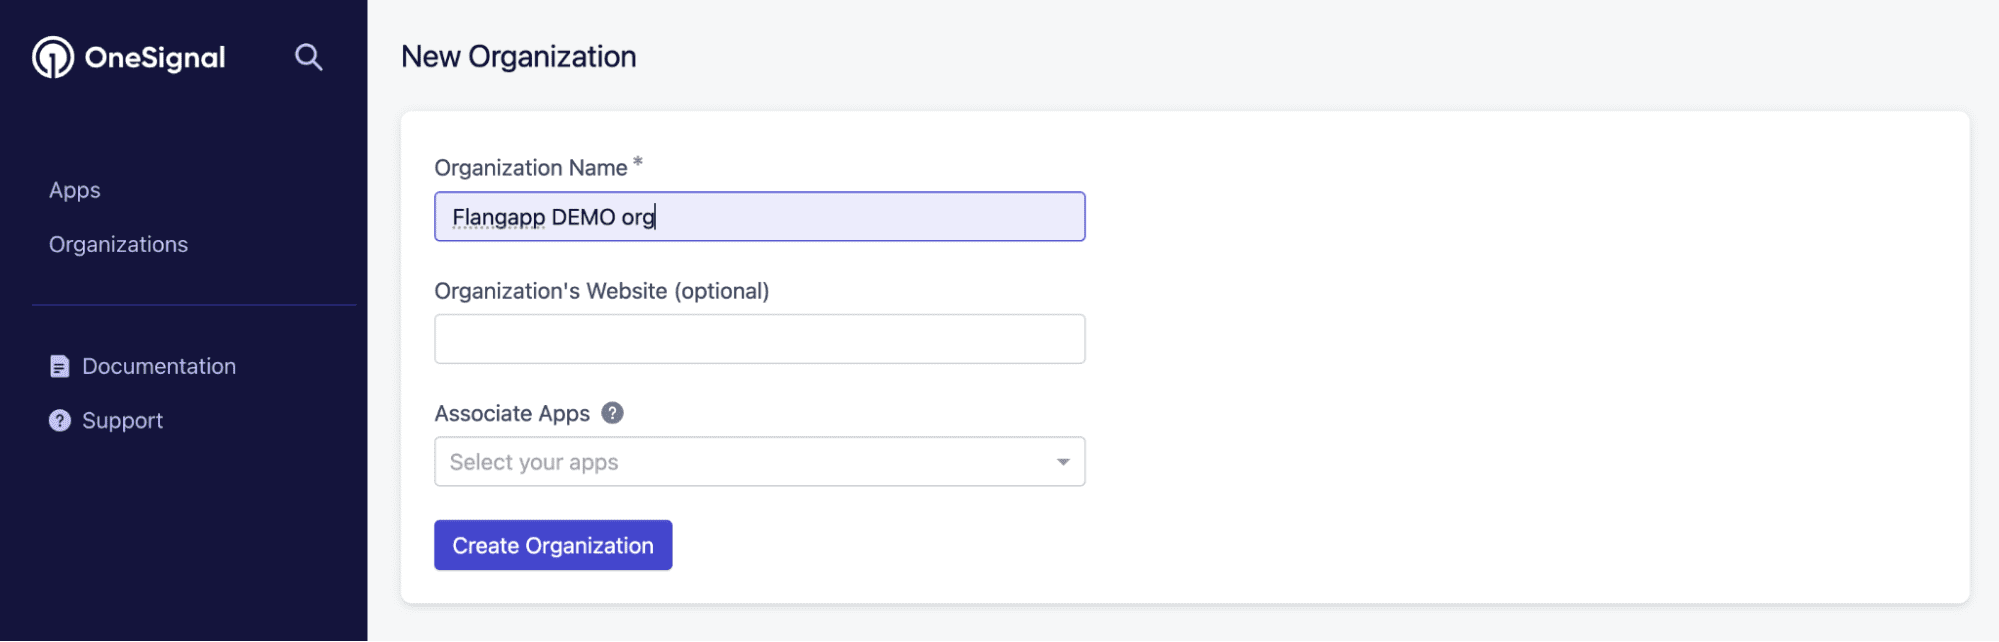
- Create a OneSignal organization at https://dashboard.onesignal.com/organizations/new and note the ID from the browser address bar.
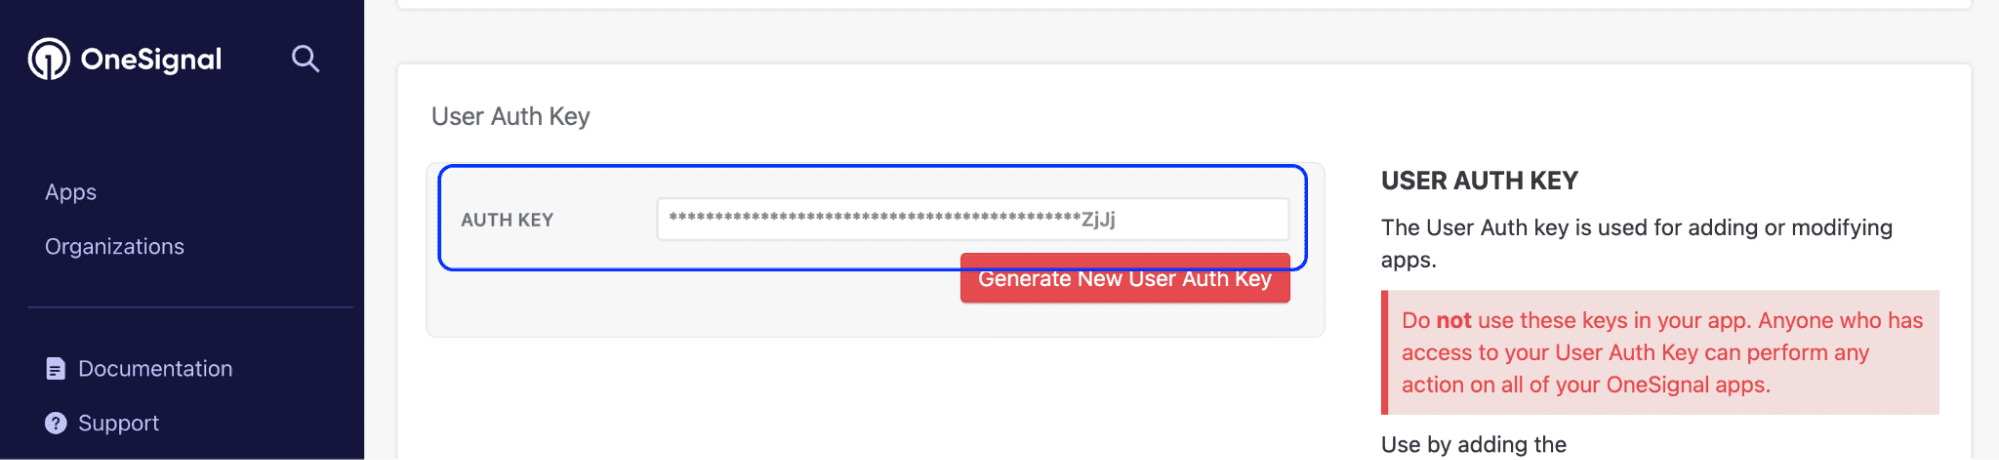
- In OneSignal account settings, find “User Auth Key” and copy it.
- Paste the Organization ID and User Auth Key into the form.

Step 5 — All Set
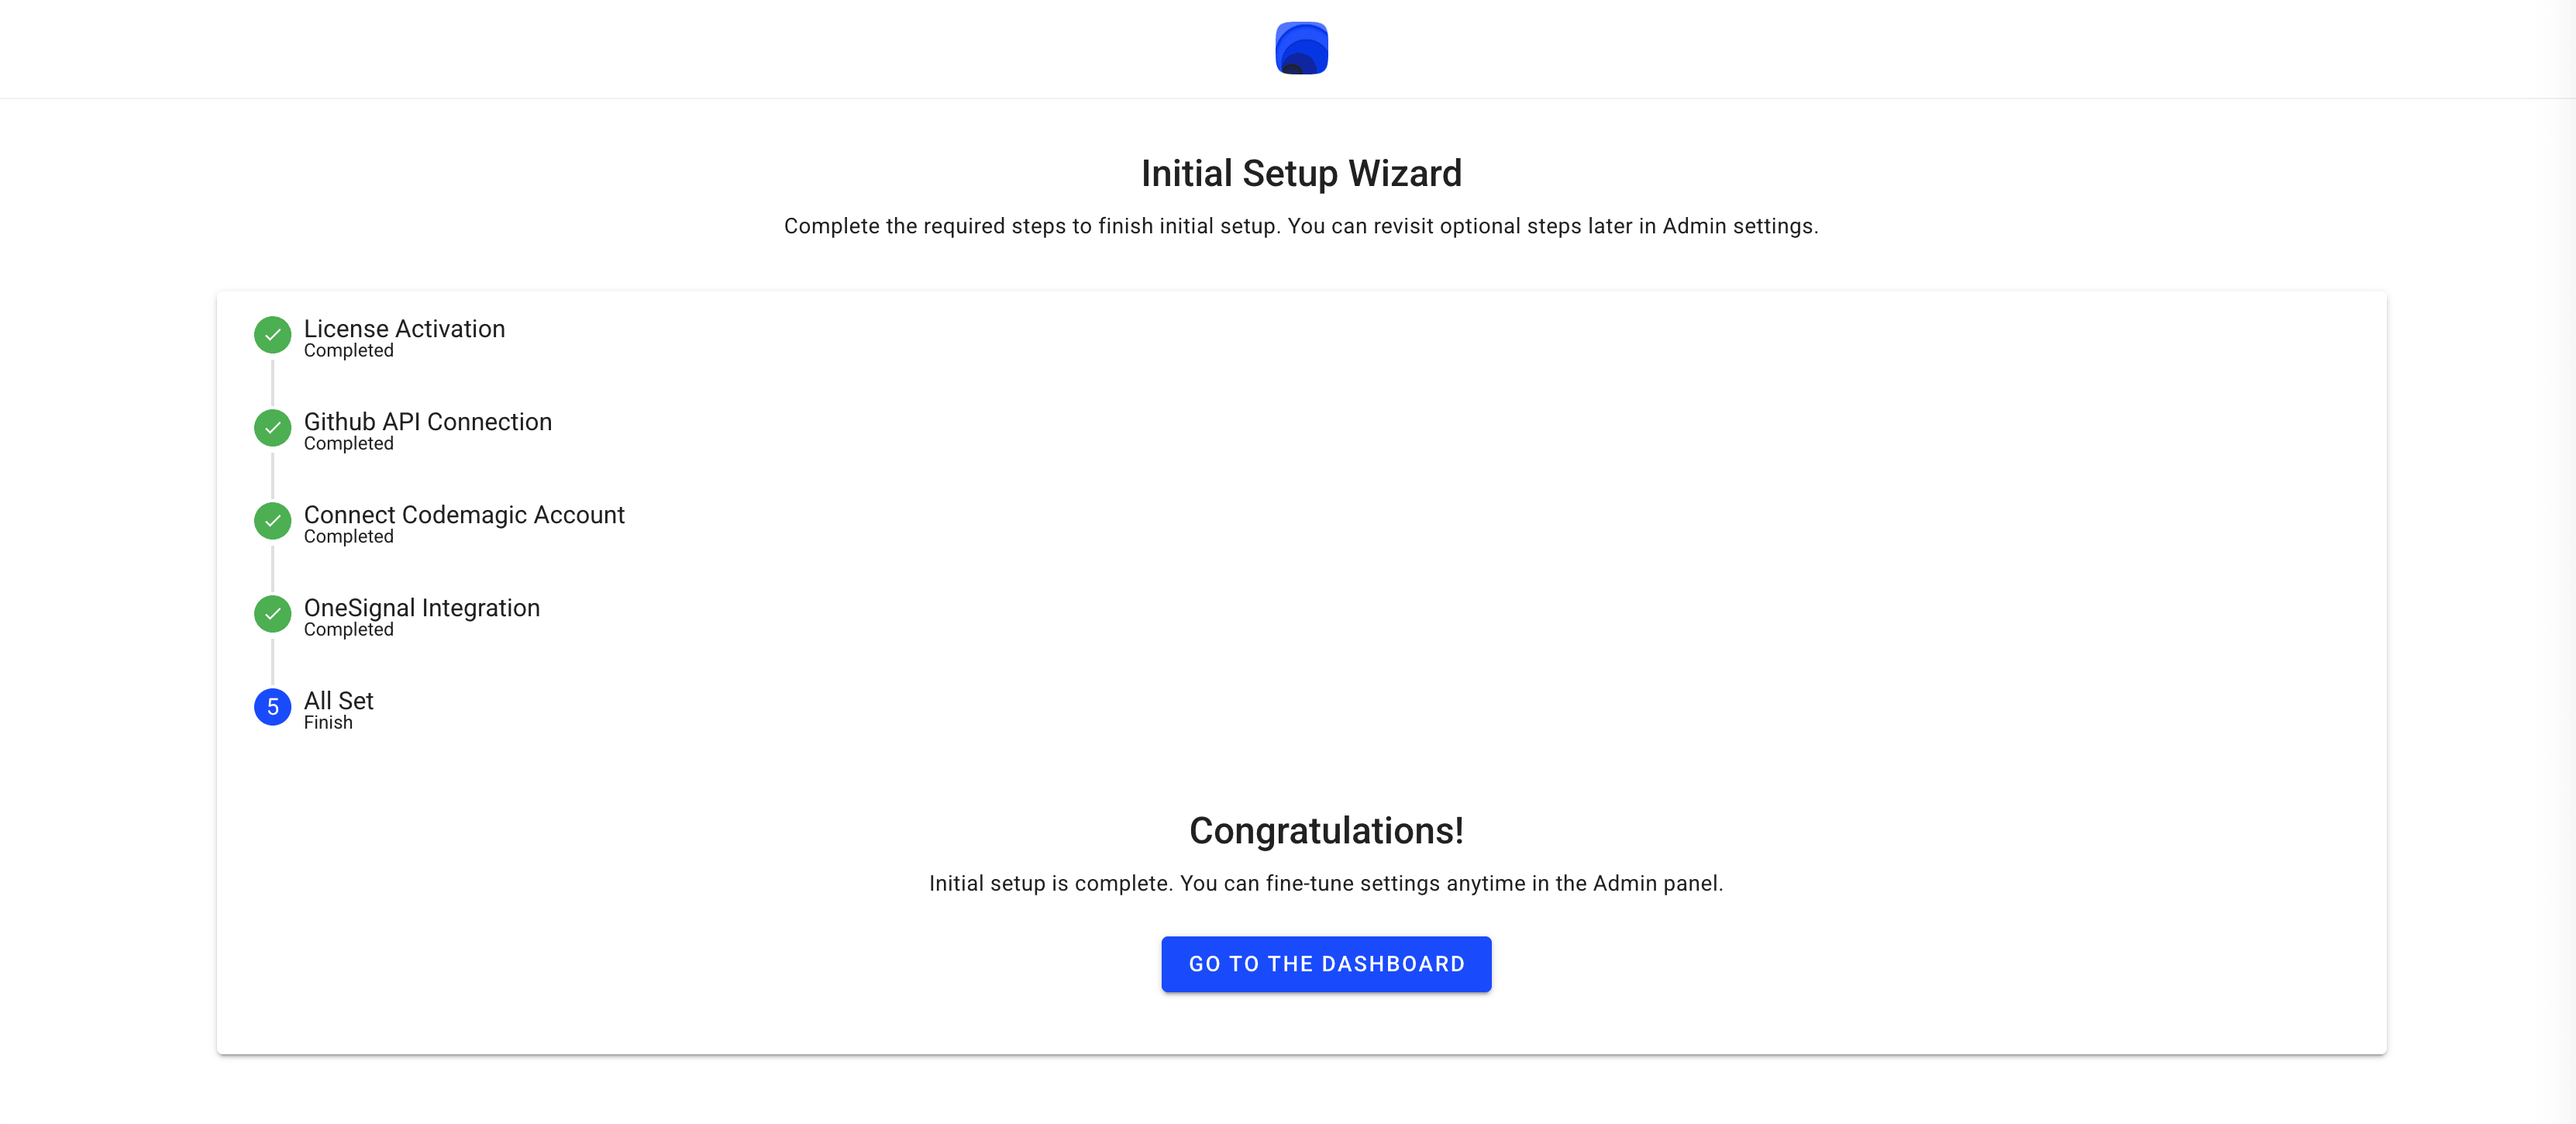
Initial setup is complete. You can fine‑tune settings anytime in the Admin panel.
Changing these settings later
Once the wizard is complete, you can revisit any of these values in the Dashboard at any time.
License Details
You can view and change your license anytime in Dashboard — Settings — License Activation.

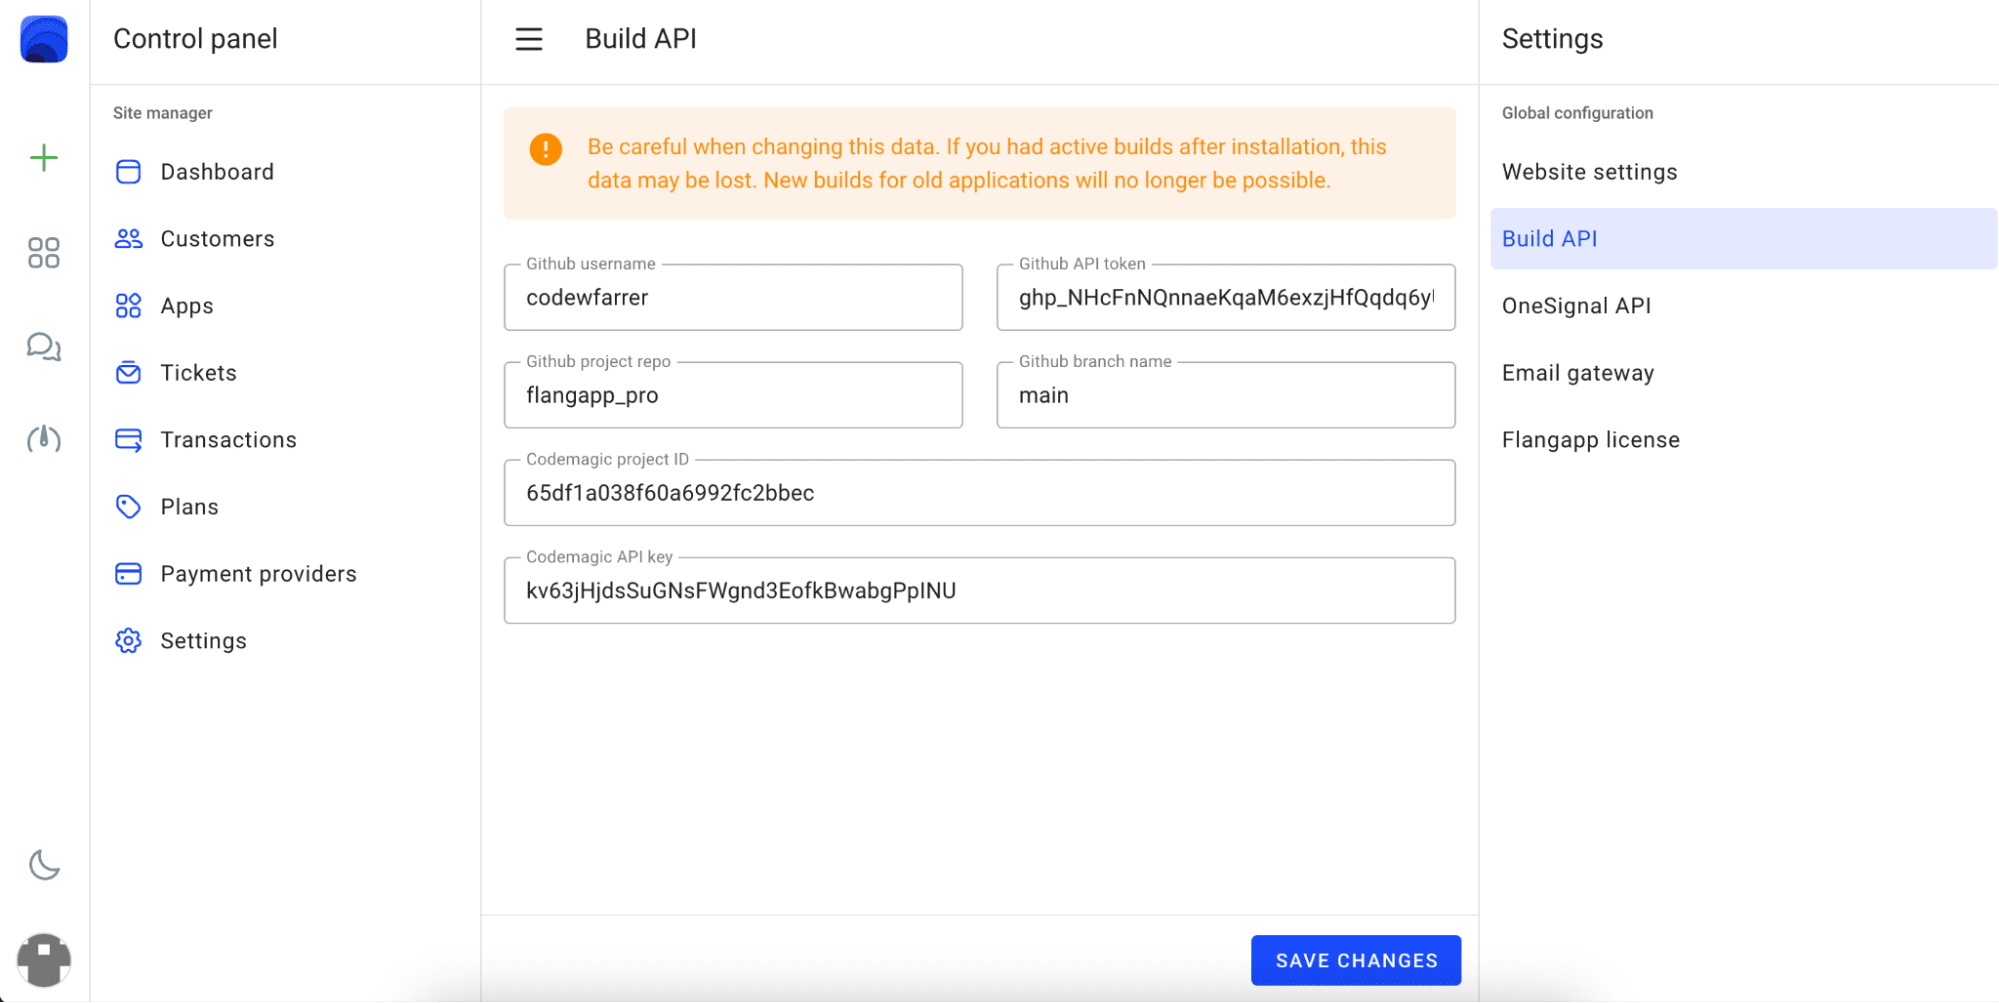
Codemagic and Github API settings
You can view and change your Codemagic and Github configuration anytime in Dashboard — Settings — Build API.
OneSignal API Settings
You can view and change your OneSignal configuration in Dashboard — Settings — OneSignal API.
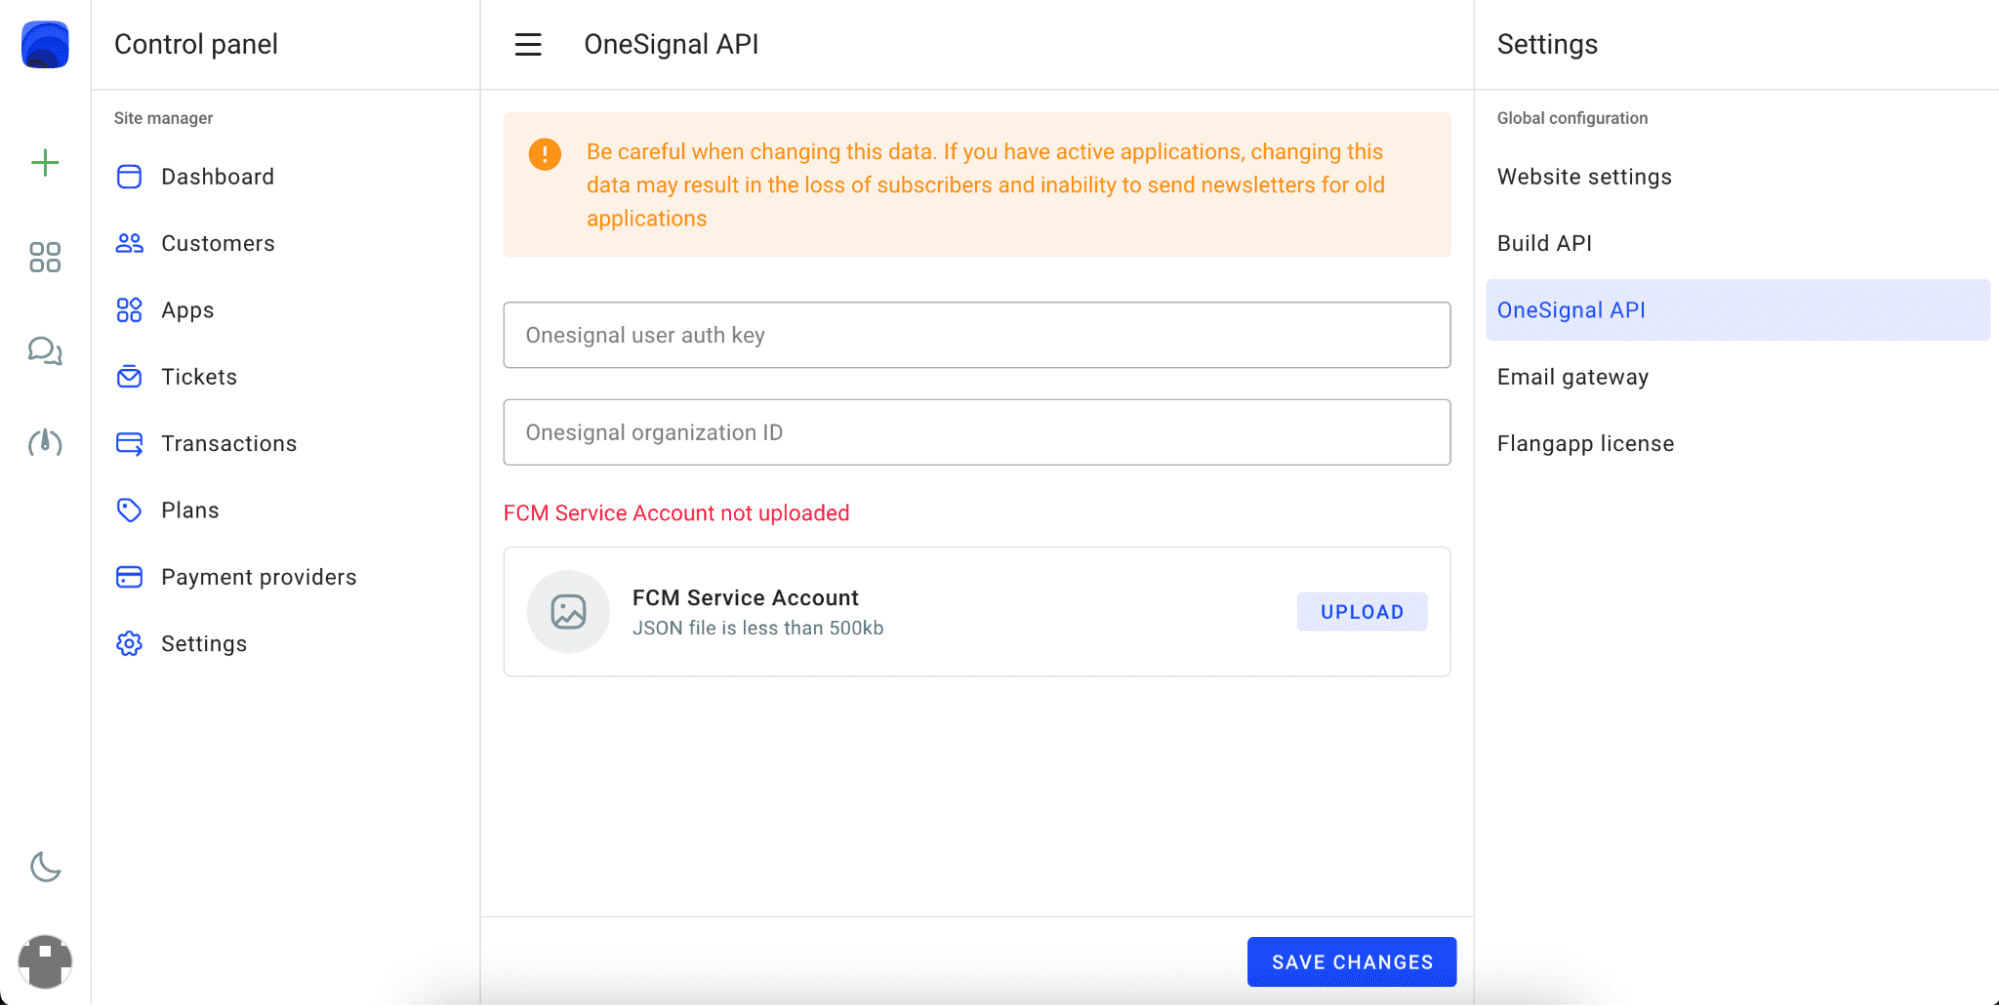
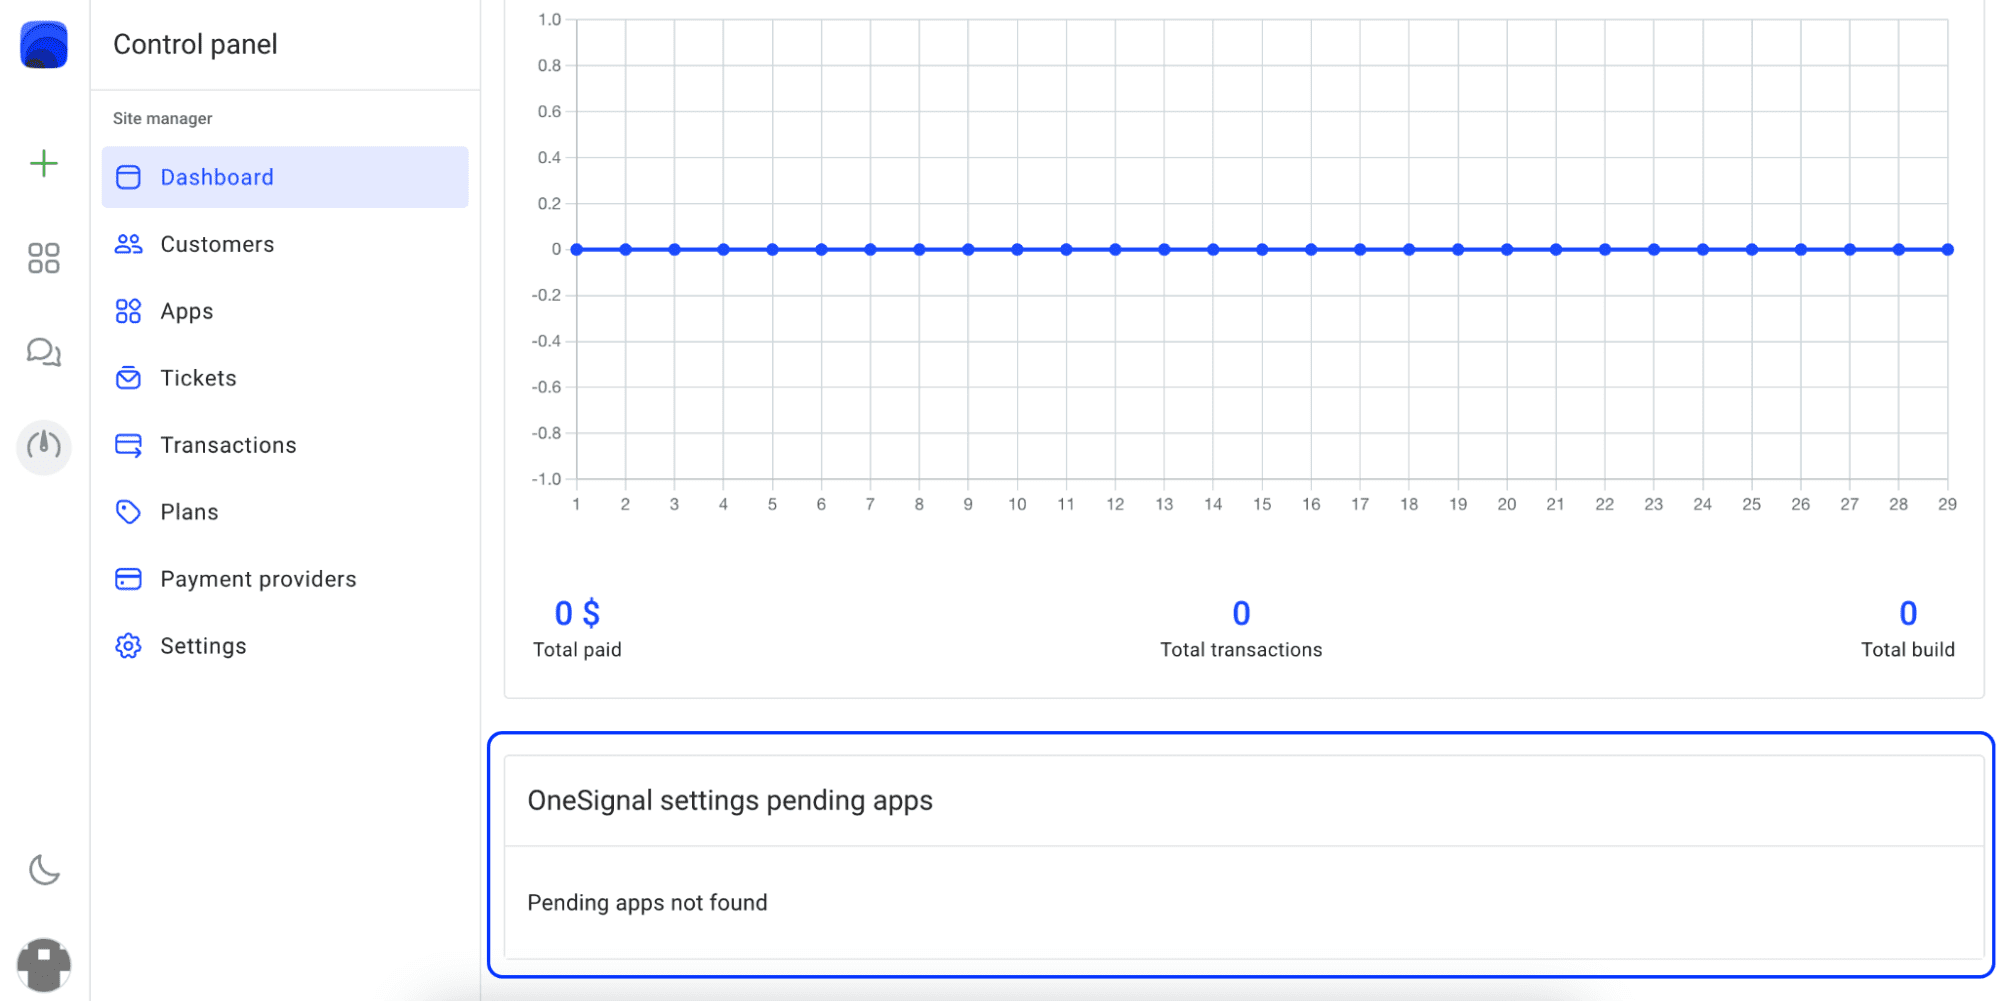
All applications will be created automatically in the OneSignal console as soon as you start building the application. However, OneSignal can not automatically transfer application API keys to create newsletters. You have to enter these values manually for each customer-paid application. If this is required you will see it in the dashboard in the “OneSignal pending apps” section.
When it is possible, you can go to the application settings and enter the integration key:
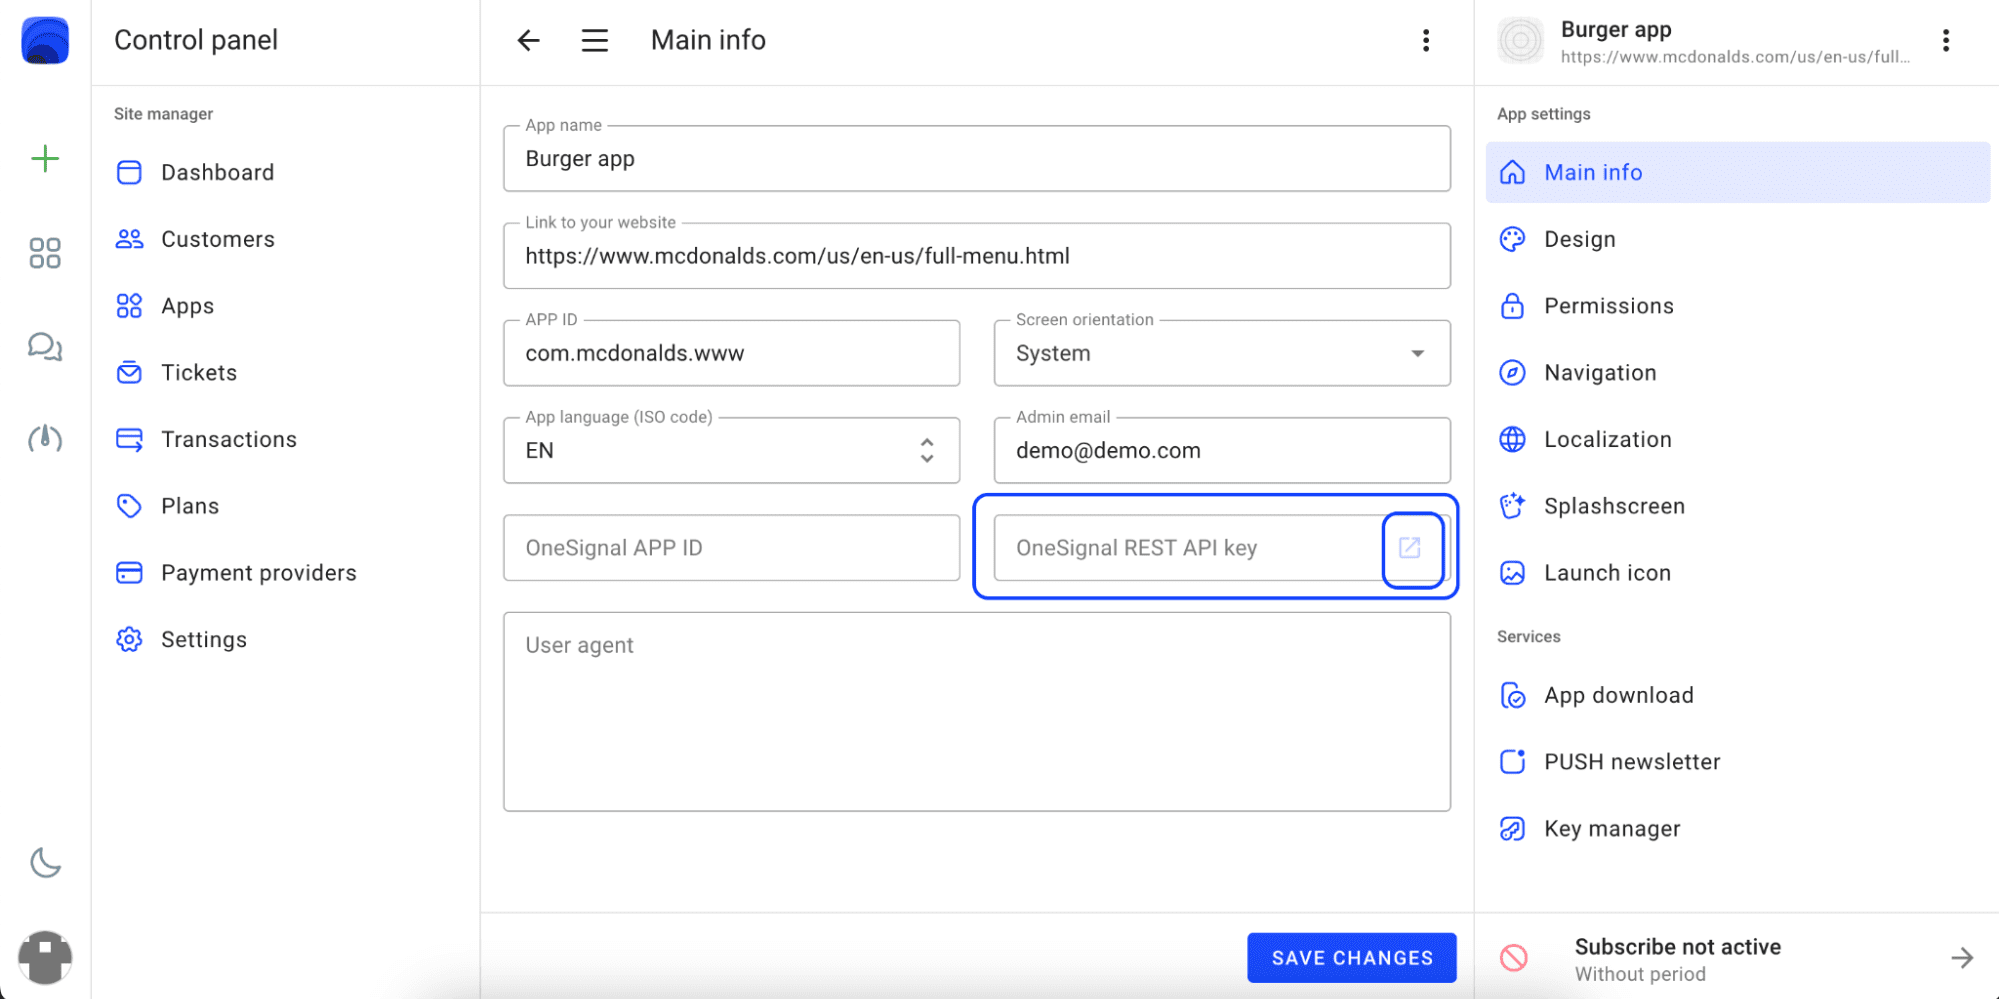
When you click the external link button a page with a key opens:
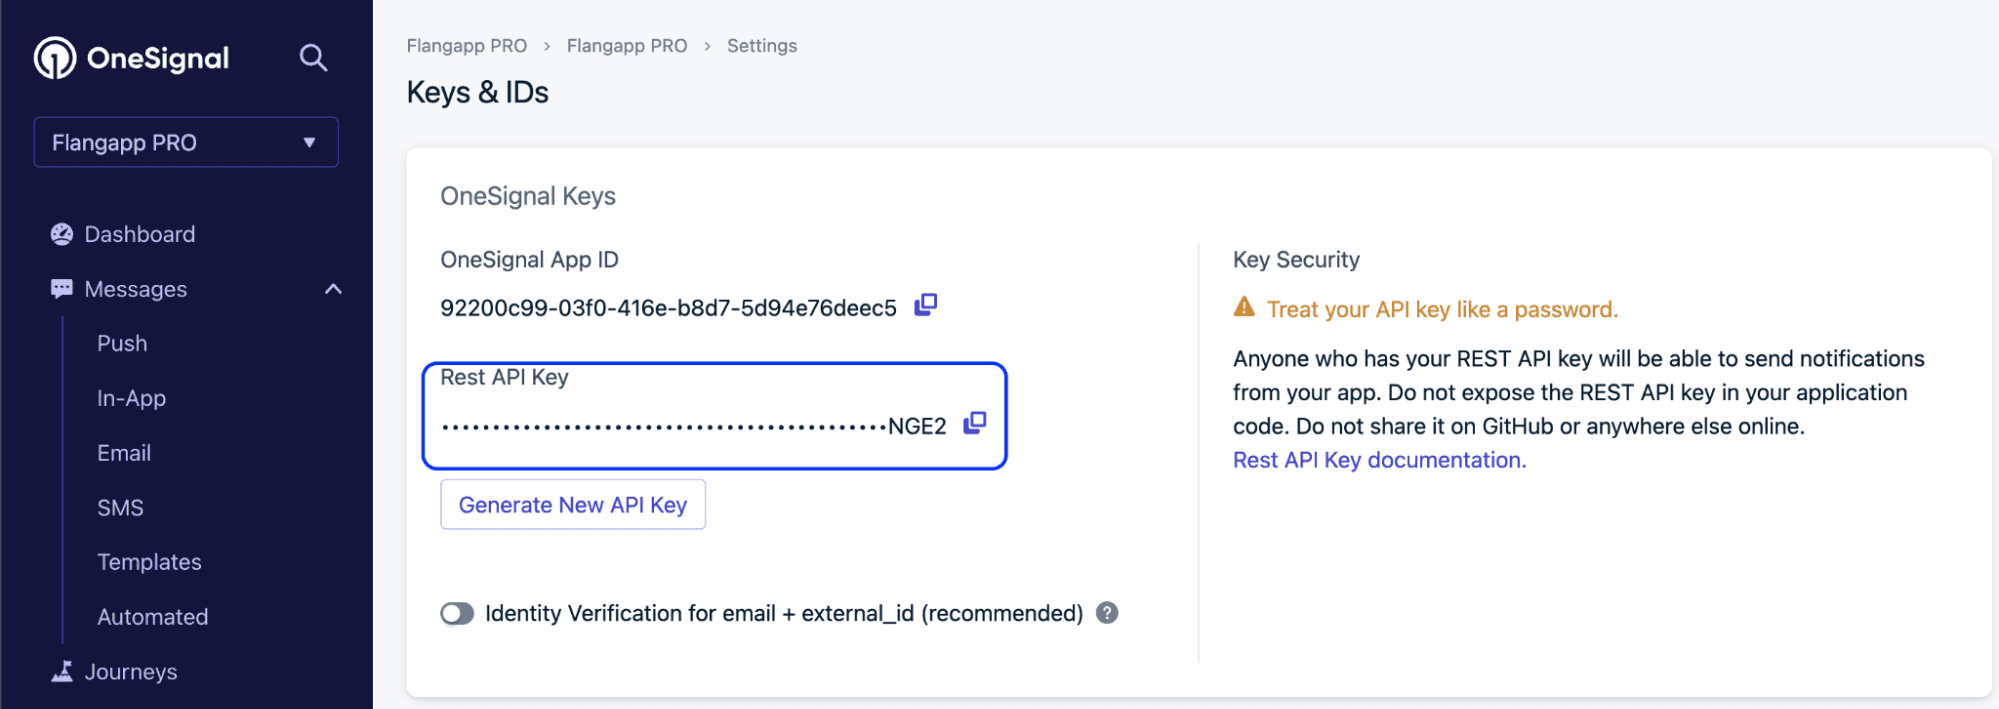
Copy the Rest API key and enter it in the “OneSignal REST API key” field.
Until you do this, your client will receive a notification that the mailing service has not yet been activated and it may take some time.
The ability to activate the service appears after the first subscription payment and the creation of the first application build.